<?xml version="1.0" encoding="utf-8"?><feed xmlns="http://www.w3.org/2005/Atom" ><generator uri="https://jekyllrb.com/" version="3.10.0">Jekyll</generator><link href="https://enaix.github.io/feed.xml" rel="self" type="application/atom+xml" /><link href="https://enaix.github.io/" rel="alternate" type="text/html" /><updated>2026-03-29T12:29:37+00:00</updated><id>https://enaix.github.io/feed.xml</id><title type="html">enaix blog</title><subtitle>A private blog</subtitle><entry><title type="html">A theoretical way to circumvent Android developer verification</title><link href="https://enaix.github.io/2025/10/30/developer-verification.html" rel="alternate" type="text/html" title="A theoretical way to circumvent Android developer verification" /><published>2025-10-30T00:00:00+00:00</published><updated>2025-10-30T00:00:00+00:00</updated><id>https://enaix.github.io/2025/10/30/developer-verification</id><content type="html" xml:base="https://enaix.github.io/2025/10/30/developer-verification.html"><![CDATA[<p><img src="/assets/img/android-skull.jpg" alt="android skull" class="img-hover" /></p>

<p>As you all know, Google has introduced developer verification as a way to prevent users from installing “unregistered” APKs. This measure was taken as a security feature to link every APK in existence to its developer, as in Play Store.</p>

<p><a href="https://developer.android.com/developer-verification">Link to the Android documentation</a>, <a href="https://developer.android.com/developer-verification/guides/faq">link to FAQ</a></p>

<h2 id="why-this-is-bad">Why this is bad</h2>

<p>This has already been discussed by <a href="https://arstechnica.com/gadgets/2025/10/google-confirms-android-dev-verification-will-have-free-and-paid-tiers-no-public-list-of-devs/">ArsTechnica</a> and on some threads (some cherry-picked ones): <a href="https://old.reddit.com/r/Android/comments/1nwddik/heres_how_androids_new_app_verification_rules/">reddit</a>, <a href="https://news.ycombinator.com/item?id=45017028">ycombinator</a>, <a href="https://hackaday.com/2025/08/26/google-will-require-developer-verification-even-for-sideloading/">hackaday</a>.</p>

<p>A quick recap of the main points (as of 30 Oct 2025):</p>

<ul>
  <li>The base tier costs $25, as in Play Market. Requires an ID</li>
  <li>There will be a limited “hobbyist” unpaid license. Google claims that they won’t require an ID</li>
  <li>Legal info is told to be private, unlike with Play Market</li>
  <li>The verification code is supposed to be located in Play Services, <strong>but Google hasn’t published the source code yet</strong></li>
  <li>Google assures that it would be possible to install applications locally using ADB, <strong>but there are no details on this</strong></li>
  <li>Hobbyist license restrictions are unknown</li>
</ul>

<p>A few months prior Google has decided to <a href="https://arstechnica.com/gadgets/2025/03/google-makes-android-development-private-will-continue-open-source-releases/">make Android development private</a>, which seems to be a preparation for the upcoming changes (<a href="https://www.androidauthority.com/google-not-killing-aosp-3566882/">another article</a>). Due to this change in AOSP release format, it is no longer possible to track what exactly Google is doing.</p>

<p>My answer to this question is that it would simply prevent small developers from distributing their apps, including myself. If we take the legal route, a hobbyist license is supposed to have some limit on the number of installs by design. If we take, say, 10K installs, this is not enough in my case. Another question is how exactly the process of verification is going to happen, what if Google adopts the same rules as in Play Store? Taking my <a href="https://github.com/enaix/Kirikiroid2-debloated">fork of the old VN engine port</a>, this apk would not pass security checks, as the old codebase relies on legacy external storage permissions, which are banned in Play Store. If we take the adb route, there are <strong>no guarantees that this method is going to work in the future in the form you expect</strong>. For instance, Google mentions that this method is meant for on-device tests during development, and nothing prevents them from reporting the install to their servers and checking if a self-signed apk has been installed on other devices. Another way to put it, this is problematic for an average Android user to perform these steps, and this is going to be the developer’s problem.</p>

<p>The situation links pretty well with Samsung <a href="https://www.sammobile.com/news/say-goodbye-to-your-custom-roms-as-one-ui-8-kills-bootloader-unlock/">removing bootloader unlocking with the One UI 8 update</a>. Great, duh…</p>

<h2 id="the-concept">The concept</h2>

<p><img src="/assets/img/loader1.svg" alt="apk loader" /></p>

<p>My vision of the hack is to distribute a verified loader apk, which in turn dynamically loads any apk the user wants. A user obtains the loader apk once and loads apps without installing as much as they want.</p>

<p>The Java virtual machine in Android is the ART/Dalvik runtime (I will refer to it as Dalvik, it seems that Google hates cool names). Did you know that Dalvik natively <a href="https://developer.android.com/reference/dalvik/system/PathClassLoader">allows dynamic code execution using PathClassLoader</a>? So an apk may just load some zip/apk/dex code from external storage and execute it in current context. Essentially, this means that we can natively load the apk into memory and execute any code inside of the target apk, and we are not altering the original code signature of the loader.</p>

<p>In order to actually run the apk, the loader needs to properly initialize the main activity (aka the main screen, or the entrypoint) of the target apk. So, the main activity needs to be initialized and somehow placed inside of the Android’s activity cycle with the loader acting as a wrapper. Then, the loader apk should handle other aspects like local files handling and names conflict resolution. This can be achieved by patching the target apk bytecode: .odex/.dex classes may be dynamically decompiled into .smali, analyzed and compiled back into a modified apk. Furthermore, the loader would have to parse AndroidManifest options of the target (main activity location, screen options).</p>

<h3 id="implementation">Implementation</h3>

<p>Developing such wrapper in a straightforward way has proven to be rather difficult, as Android <a href="https://android.googlesource.com/platform/frameworks/base/+/master/core/java/android/app/Activity.java">activity management logic</a> is extremely complicated and differs from version to version. In short, it was problematic to perform the initialization process the right way. Some people suggested to avoid the initialization step completely, and use Unsafe Dalvik api to register the target’s activity as the loader apk activity stub, which is declared in the loader’s manifest without class. I couldn’t find exact methods in the <a href="https://developer.android.com/reference/sun/misc/Unsafe">Unsafe documentation</a>, but this actually may be a way to go.</p>

<p>Due to this particular issue I couldn’t bring the proof of concept to a working state in a reasonable time, and because of this I was considering to not publish this article at all. The purpose of this post is not to give a somewhat ready solution, but get some feedback on the concept, as I was not ready to devote lots of time on a potentially broken solution.</p>

<h2 id="the-logistics">The logistics</h2>

<blockquote>
  <p><strong>Information provided in this section is for educational use only, all scenarios discussed below are hypothetical.</strong></p>
</blockquote>

<p>In order to install the loader apk on the device, it would require, well, some form of verification. Hobbyist license is the only choice here, as paying $25 for each attempt is not optimal. Since the hobbyist license has a limited number of installs, there should be multiple instances of the apk with separate licences. In this hypothetical scenario there may either be a pool of volunteers who sign the code, or completely random users who are willing to help. In the second case, the loader code would somehow need to be verified or scanned, since such distribution system would be vulnerable to malware.</p>

<p>The final and the most important issue in this process is the verification process itself, as the loader code may (and likely will) be flagged by Google. So, the code would require some form of obfuscation like code flow modification and implementing double functionality (for instance, registering it as a file manager). If Google decides to ban dynamic code loading altogether, the final solution would be to pack the Dalvik runtime into the loader as a native library. This of course would have extremely low performance, but it should be technically possible.</p>

<p>Overall, the hypothetical plan has lots of assumptions, with which I’m not happy with. First of all, it requires lots of manual work by the volunteers or random people, and this work also includes the apk obfuscation, which was not discussed in detail. Then, the verification process itself should be somewhat permissive to allow potentially suspicious apps (I would like to hear how does this happen with current Play Store verification).</p>

<h2 id="conclusion">Conclusion</h2>

<p>The project described in this article by no means is a finished solution, and if you have started to think what else could work, it means that the article has reached its original goal. I believe that we would eventually come up with a proper solution in the future. Thank you for reading!</p>

<p>You may find the source code <a href="https://github.com/enaix/apk-loader">here</a>. Feel free to create an issue if you wish to discuss</p>

<h1 id="update-1">Update 1</h1>

<p>Linking the <a href="https://news.ycombinator.com/item?id=45776269">ycombinator thread</a> here.</p>

<p>The most common reaction to this post was “why bother, there exists adb and Shinzuku”.</p>

<h2 id="why-we-should-bother">Why we should bother</h2>

<p>We can only hope that Google allows to install distributed APKs over adb in the future, as they explicitly stated that they will allow this for developers to test <strong>their own</strong> APKs:</p>

<blockquote>
  <p>As a developer, you are free to install apps without verification with ADB. This is designed to support developers’ need to develop, test apps that are not intended or not yet ready to distribute to the wider consumer population</p>
</blockquote>

<p>It is possible for them to do the following:</p>

<ul>
  <li>Limit the number of installs of an unverified APK, limit it to a single device or go the Apple way (uninstall app after a time limit). This technically won’t prevent developers from testing their apps</li>
  <li>Make it harder to unlock the developer options by requiring some kind of verification that you are a developer. This seems to be less likely, since it’s quite tricky to implement.</li>
</ul>

<p>There is no reason to dismiss this scenario, as it aligns with Google’s recent actions against power users like making AOSP development private, not publishing Pixel device trees and irrationally trying to ban ad blockers on Youtube (though the last point is partially related to Android through Vanced). If the subset of users who utilize adb is going to be large enough (and it will be), what exactly is stopping them from doing something about it?</p>

<h2 id="efficiency">Efficiency</h2>

<p>Another opinion was that it is “not a good idea to try and find a technical solution to a people/organisation problem”. Furthermore, if such solution is implemented, it is going to require too much effort to maintain, as each upload is going to be almost immediately banned by Google. I absolutely agree with both of these takes, since the apk loader developers are likely going to give up sooner or later.</p>

<p>In this post I’ve made a critical mistake of not putting the emphasis on the removal of bootloader unlock, since in fact it’s indeed awful, as it makes people stuck with Google’s restrictions in the first place. While the first move was done by Samsung, it’s still very alarming as a precedent. Right now the situation with AOSP-based ROMs is not great, as you have to own a specific device like a Pixel or OnePlus model, and Google keeps messing with AOSP. The true hope here are root-based solutions, as they work on stock Android - I hope that they are not going to go anywhere in the future.</p>]]></content><author><name></name></author><summary type="html"><![CDATA[]]></summary><media:thumbnail xmlns:media="http://search.yahoo.com/mrss/" url="https://enaix.github.io/assets/img/android-skull.jpg" /><media:content medium="image" url="https://enaix.github.io/assets/img/android-skull.jpg" xmlns:media="http://search.yahoo.com/mrss/" /></entry><entry><title type="html">How I discovered that Bill Gates monopolized ACPI in order to break Linux</title><link href="https://enaix.github.io/2025/06/03/acpi-conspiracy.html" rel="alternate" type="text/html" title="How I discovered that Bill Gates monopolized ACPI in order to break Linux" /><published>2025-06-03T00:00:00+00:00</published><updated>2025-06-03T00:00:00+00:00</updated><id>https://enaix.github.io/2025/06/03/acpi-conspiracy</id><content type="html" xml:base="https://enaix.github.io/2025/06/03/acpi-conspiracy.html"><![CDATA[<p><img src="/assets/img/acpi.png" alt="acpi conspiracy" class="img-hover" /></p>

<p><em>(Feel free to skip to the Bill Gates section for the non-technical part)</em></p>

<p>While I was working on my first preprint mid-May, my Steam Deck suddenly broke. The charging circuit couldn’t negotiate the voltage, something went wrong and the smart battery controller entered in permanent failure mode. We managed to desolder the lithium cells from the battery package PCB and replaced the fuse, but the controller still wouldn’t take charge. While reading the <a href="https://www.ti.com/lit/ug/sluua43a/sluua43a.pdf">bq40zxy protocol</a>, I’ve discovered that it is possible to disable <em>PERMANENT FAILURE</em> mode by calling a special <code class="language-plaintext highlighter-rouge">ManufacturerAccess</code> Smart Battery System (SBS) command, which is done over the SMBus. And so, the adventure began.</p>

<h2 id="how-do-i-talk-to-the-sbs-controller">How do I talk to the SBS controller?</h2>

<p>As SMBus is derived from I2C and these protocols are closely related, the intuition was that I could access SMBus using the <code class="language-plaintext highlighter-rouge">i2c-tools</code> driver, which provides this functionality using <code class="language-plaintext highlighter-rouge">&lt;i2c/smbus.h&gt;</code>. I wrote a simple SBS utility, tested the devices which exposed the <code class="language-plaintext highlighter-rouge">0xb</code> battery address and got… nothing. The only responding device returned plain zeros. I was trying to find the mistake in my code, cross-checked every line in my code against <a href="https://github.com/emersonknapp/smart_battery_driver">another SBS driver (ROS node) implementation</a>, but I didn’t find any error. The reason was that in my case the SMBus was simply connected to the embedded controller (EC), not the I2C bus.</p>

<h3 id="into-the-ec-rabbithole">Into the EC rabbithole</h3>

<p>Embedded Controller (aka EC, SuperIO) is the modern IBM PC equivalent of various I/O logic circuitry which handles legacy stuff (PS/2, floppy, serial and parralel ports) and modern subsystems (ACPI, GPIO, fan, thermals, SMBus, etc). The main way to communicate to the controller is through the kernel using the <a href="https://git.kernel.org/pub/scm/linux/kernel/git/stable/linux.git/tree/drivers/acpi/ec.c">linux/drivers/acpi/ec.c</a> driver, which effectively writes to the CPU IO pins as described in <a href="https://tldp.org/HOWTO/IO-Port-Programming-2.html">this article on I/O ports usage</a>. <code class="language-plaintext highlighter-rouge">ec_read()</code> and <code class="language-plaintext highlighter-rouge">ec_write()</code> commands are great, but I don’t know neither the addressnor the protocol format for telling the EC chip to execute the SMBus transaction. At this point there is almost no documentation on this kind of stuff, so the best bet was to analyze how the kernel operates with the hardware.</p>

<p>Thankfully, the kernel already has the driver for communicating to the SBS over SMBus through EC: <a href="https://git.kernel.org/pub/scm/linux/kernel/git/stable/linux.git/tree/drivers/acpi/sbs.c">linux/drivers/acpi/sbs.c</a> handles the SBS protocol, while <a href="https://git.kernel.org/pub/scm/linux/kernel/git/stable/linux.git/tree/drivers/acpi/sbshc.c">linux/drivers/acpi/sbshc.c</a> performs direct calls to the EC and executes SMBus transactions. So I started digging how this driver works and found that it finds ACPI devices with <code class="language-plaintext highlighter-rouge">hid</code> equal to <code class="language-plaintext highlighter-rouge">ACPI0001</code> or <code class="language-plaintext highlighter-rouge">ACPI0005</code>, calls the ACPI <code class="language-plaintext highlighter-rouge">_EC</code> method and calculates the value <code class="language-plaintext highlighter-rouge">(val &gt;&gt; 8) &amp; 0xff;</code> as the address to send SMBus packages. Huh.. This is an oddly specific way to simply start talking to the bus. At least the kernel driver handles.. <strong>it does not. The driver couldn’t load the device.</strong> In order to investigate this, I needed to try calling this method and seeing what it outputs. <em>(As at that time I haven’t lost the hope in finding the solution yet, I’ve tried writing the userspace driver to avoid writing a whole kernel module. Wasted lots of time and ended up writing the <code class="language-plaintext highlighter-rouge">sbsctl</code> module. Silly me…)</em></p>

<p>This started to get weird, since there were no devices with such HIDs. I thought that the device could be under a different hid, but calling the exact same <code class="language-plaintext highlighter-rouge">_EC</code> module as in <code class="language-plaintext highlighter-rouge">sbshc.c</code> resulted in failure for the most likely candidates. At the same time <code class="language-plaintext highlighter-rouge">ec.c</code> successfully found the EC under <code class="language-plaintext highlighter-rouge">\_SB_.PCI0.LPC0.EC0_</code>, but this device doesn’t have a <code class="language-plaintext highlighter-rouge">_EC</code> method! Like.. What? How do I get the offset then?</p>

<h2 id="this-is-where-the-fun-begins">This is where the fun begins</h2>

<p>Long story short, the OS needs some standardized way to access various devices, since it doesn’t know which devices are present and how to access them. ACPI is the interface between the motherboard (hardware) components and the OS which is designed to do exactly this: act as a robust layer between software and hardware, which minimizes the chance of calling a command at a wrong address and causing hardware damage. Except that it provides all information in a custom domain-specific language called ASL (?) with no guaranteed error-prone way of parsing it (??) other than praying that the <code class="language-plaintext highlighter-rouge">iasl</code> (Intel ASL compiler, part of the Linux kernel) correctly parses the tables (???) or simply giving up and using Windows with their Microsoft ASL compiler (?!!)</p>

<p>I get that the environment ACPI needs to operate in is complex, but I just need to simply get an address to send SMBus commands, and ACPI fails at the single task it needs to do??</p>

<p>OK, but what about the official specification? Perhaps there is a bug in the driver, and there is a reasonable explanation to all of this.. <a href="https://uefi.org/htmlspecs/ACPI_Spec_6_4_html/13_ACPI_System_Mgmt_Bus_Interface_Spec/accessing-the-smbus-from-asl-code.html">ACPI specs describing how to access the SMBus</a> tells us that the SMBus controller built into the EC must be present as a <code class="language-plaintext highlighter-rouge">ACPI0001</code> or <code class="language-plaintext highlighter-rouge">ACPI0005</code> and should indeed have the <code class="language-plaintext highlighter-rouge">_EC</code> method, which provides the address offset and the query bit. The Steam Deck indeed has the ITE SuperIO controller with builtin SMBus functionality, but the ACPI device is not present. At the same time, a separate SMBus controller should be loaded under a custom HID with no way of providing essential info, and the specs tells that the OS should somehow handle this:</p>

<blockquote>
  <p>Regardless of the type of hardware, some OS software element (for example, the SMBus HC driver) must register with OSPM to support all SMBus operation regions defined for the segment. This software allows the generic SMBus interface defined in this section to be used on a specific hardware implementation by translating between the conceptual (for example, SMBus address space) and physical (for example, process of writing/reading registers) models. Because of this linkage, SMBus operation regions must be defined immediately within the scope of the corresponding SMBus device.</p>
</blockquote>

<p>What am I reading is the official specification, right? <strong>They acknowledge that knowing the address offset is essential, but do not provide any means to get the said address.. What the hell?</strong> What this means is that there is <strong>no way to get this info unless the OS magically has a driver for talking to the exact controller</strong>. Isn’t the only reason why ACPI exists is to prevent such dependence in the first place?</p>

<blockquote>
  <p>The responsibility for the definition of ACPI namespace objects, required by an SMBus 2.0-compatible host controller driver to enumerate non-bus-enumerable devices, is relegated to the Smart Battery System Implementers Forum.</p>
</blockquote>

<p>Yeah, why not</p>

<h3 id="the-ec-chips">The EC chips</h3>

<p>It is worth mentioning that the most popular (takes &gt;90% of the market) EC/SuperIO chip manufacturer ITE doesn’t provide any datasheets or info to like a half of their chips, and it was extremely hard to find any info on how does it operate. I randomly stumbled upon <a href="https://archive.org/details/it-5570-a-v-0.3.1-u/page/n5/mode/2up">this datasheet for a particular chip on archive.org</a> and <a href="https://github.com/system76/ec">System76 EC firmware</a>, which helped a lot. The datasheet is the only source of info on how is the chip supposed to talk to the CPU, and the firmware does the actual work decoding the registers. It seems that ITE is only willing to provide this data to other companies, as some datasheets I was able to find on their website are marked as confidential.</p>

<h1 id="bill-gates">Bill Gates</h1>

<p>These issues have already been discussed since the 2000s, and ACPI was <a href="https://en.wikipedia.org/wiki/ACPI#cite_note-linux-mag-162-52">described</a> by Linus as a “complete design disaster in every way”. Furthermore, ACPI seems to be deliberately designed to require OS-level drivers for basic functionality and have extremely vague “specifications”. As if a singular company could have exclusive access to the vital information…</p>

<p>And then I accidentally found <a href="https://lwn.net/Articles/237085/">this article on ACPI debugging</a>, which references the <a href="https://web.archive.org/web/20070927015231/http://antitrust.slated.org/www.iowaconsumercase.org/011607/3000/PX03020.pdf">memo written by Bill Gates in 1999</a>:</p>

<blockquote>
  <p>One thing I find myself wondering about is whether we shouldn’t try and make the “ACPI” extensions somehow Windows-specific. If seems unfortunate if we do this work and get our partners to do the work and the result is that Linux works great without having to do the work. … Maybe we couid define the APIs so that they work well with NT and not the others even if they are open. Or maybe we could patent something relaled to this.</p>
</blockquote>

<p>What. The. Heck.</p>

<p>This is insane.. Isn’t it like the textbook definition of lobbying? I wasn’t expecting to find a whole conspiracy while trying to fix my Deck, perhaps the memo is a hoax or something, but this all just lines up so naturally. If it <em>really</em> was his plan, then he succeeded.</p>

<h2 id="what-do-we-do-now">What do we do now?</h2>

<p>Of course I cannot advise anyone to do something crazy like decompiling NT kernel due to the potential lawsuits against the Linux Foundation or someone else. The best course of action would be to patch Linux ACPI drivers to improve the support, especially in cases where the specs do not provide any info. Personally, I will continue analyzing the issue with the SMBus protocol, developing the <a href="https://github.com/enaix/sbsutil">sbsutil</a> project and hopefully making a patch to the <code class="language-plaintext highlighter-rouge">sbshc</code> driver. <em>(Note that the repo is in early WIP, README is out-of-date)</em></p>

<p>This is not Valve’s mistake for not setting up the SMBus communications, but rather the issue of the ACPI itself. Still, that would be huge kudos for Valve if they patched this <em>(your console is awesome btw)</em></p>

<hr />

<h1 id="updates">Updates</h1>

<h2 id="upd-1">Upd 1</h2>

<p>Wow, this blew up! Thanks a lot for the nice comments, it was pleasing to see all this feedback</p>

<h3 id="trivia">Trivia</h3>

<ul>
  <li>This leaked document is a part of <a href="https://en.m.wikipedia.org/wiki/Halloween_documents">Halloween documents</a>.</li>
  <li>As a result of <a href="https://en.m.wikipedia.org/wiki/Microsoft_litigation#cite_note-21">Iowa anti-monopaly class action lawsuit</a>, MS settled the case for $180M, which is only 0.3% of their <a href="https://www.microsoft.com/investor/reports/ar07/staticversion/10k_sl_eng.html">revenue in 2007</a>. This lawsuit seems not to be directly linked to the Halloween documents AFAIK.</li>
  <li>In EU, reverse engineering is not illegal if done properly (see clean room approach).</li>
</ul>

<p>Another engineer has encountered similar ACPI issues in the past, here’s the link to his detailed guide on fixing DSDT tables: <a href="https://antenore.simbiosi.org/fixing-broken-acpi-dsdt-linux/">antenore blogpost</a></p>

<p>The user <code class="language-plaintext highlighter-rouge">u/BitOBear</code> posted a detailed story of <a href="https://www.reddit.com/r/linux/comments/1l2rn3t/oc_how_i_discovered_that_bill_gates_monopolized/mvysmws/">Microsoft inner management practices of that time</a>. Bizarre stuff</p>

<p>Overall, I’m going to report the bug to Valve soon! Stay tuned</p>]]></content><author><name></name></author><summary type="html"><![CDATA[]]></summary><media:thumbnail xmlns:media="http://search.yahoo.com/mrss/" url="https://enaix.github.io/assets/img/acpi.png" /><media:content medium="image" url="https://enaix.github.io/assets/img/acpi.png" xmlns:media="http://search.yahoo.com/mrss/" /></entry><entry><title type="html">Fixing HyperX RGB DRAM color glitch</title><link href="https://enaix.github.io/2024/11/08/hyperx-color-fix.html" rel="alternate" type="text/html" title="Fixing HyperX RGB DRAM color glitch" /><published>2024-11-08T00:00:00+00:00</published><updated>2024-11-08T00:00:00+00:00</updated><id>https://enaix.github.io/2024/11/08/hyperx-color-fix</id><content type="html" xml:base="https://enaix.github.io/2024/11/08/hyperx-color-fix.html"><![CDATA[<p><img src="/assets/img/rgb_banner.jpg" alt="trinity rig rgb" /></p>

<h4 id="wip">WIP!!!</h4>

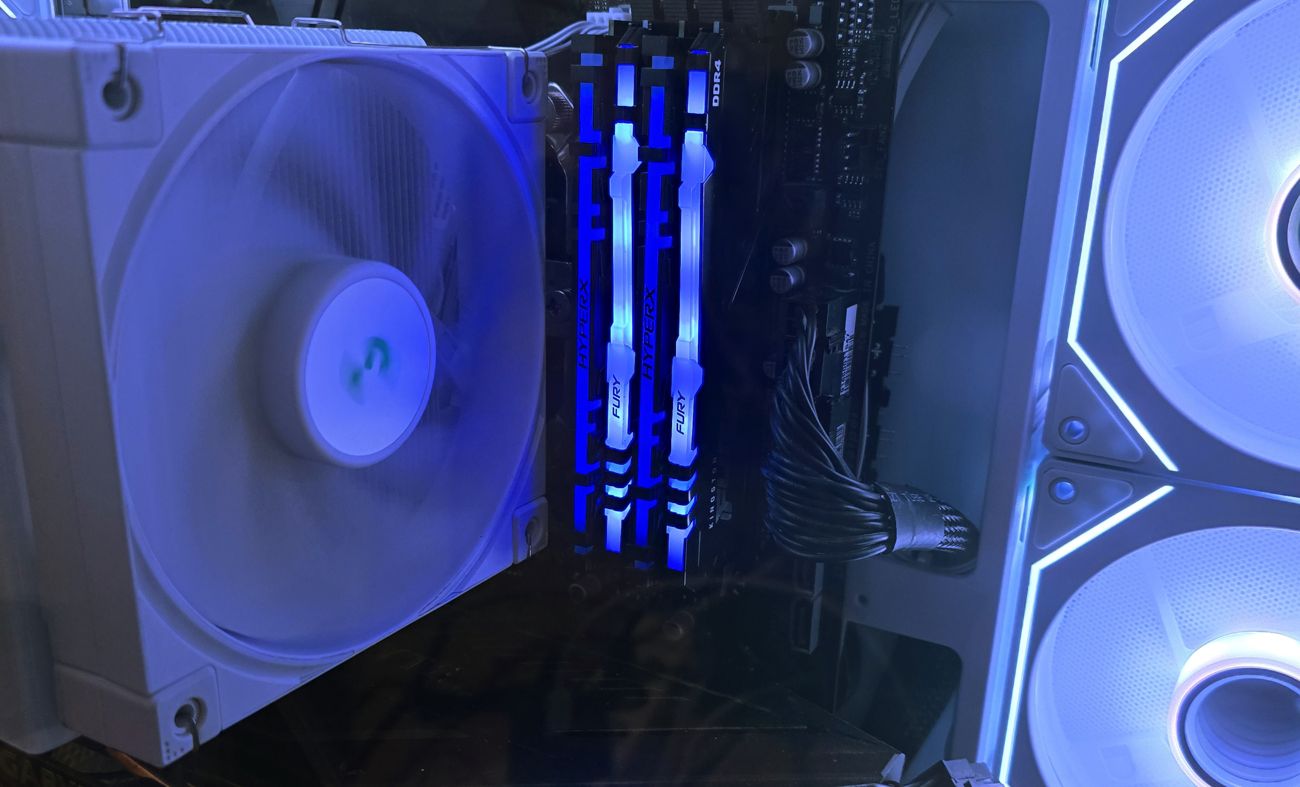
<p>Due to my new research project, I had to upgrade my rig for the first time - it was built back in 2020 and needed some enchancements. Firstly, I’ve replaced a dying SSD, then swapped Ryzen 5 3600 with a beefier Ryzen 7 5700x. The old cooler couldn’t effectively cool down the new CPU in precision boost mode, so I also had to swap out both the cooler and pc case. Finally, I’ve mixed 2 new 16 GB HyperX Fury ram sticks with the old 2x8 HyperX Predator ones. Luckily, the sticks booted up just fine (I even managed to overclock them to 3200 GHz 15-17-17), but there was a weird issue: <strong>blue channel on the old sticks was dim</strong>. This didn’t only happen in <code class="language-plaintext highlighter-rouge">OpenRGB</code>, but also in stock rainbow mode</p>

<h2 id="the-problem">The problem</h2>

<p>Since the sticks show this dimming issue in all modes, that’s the incompatibility issue between old and new HyperX RGB controllers. To understand how this works, we need to understand how does the software communicate to the ram sticks.</p>

<p>Another interesting problem is that ram sticks use optical sensors for syncing the clock between each other, and it seems that the position of these sensors is different on the newer ones. Due to this effect the color cycle effect desyncs after some time</p>

<h4 id="controlling-dram-rgb">Controlling DRAM RGB</h4>

<p><img src="/assets/img/dram_i2c-1.svg" alt="dram i2c chart" /></p>

<p>HyperX ram is controlled on address <code class="language-plaintext highlighter-rouge">0x27</code> using global commands that control all of the rgb sticks. This means that the sticks should have some communication protocol.</p>

<p>Each ram stick has <code class="language-plaintext highlighter-rouge">SPD</code> controller, which has 3 additional pins <code class="language-plaintext highlighter-rouge">SA0</code>-<code class="language-plaintext highlighter-rouge">SA2</code> in order to determine the slot. Only one common pin (<code class="language-plaintext highlighter-rouge">ACT_n</code>, <code class="language-plaintext highlighter-rouge">VDDSPD</code>) is directly connected to the bus, so in order to select each particular chip, <code class="language-plaintext highlighter-rouge">Device Type Identifier Code</code> prefix should be appended to the i2c command. It means that we can directly access each SPD controller on address range <code class="language-plaintext highlighter-rouge">0x30 - 0x37</code></p>

<p>Let’s analyze available addresses using <code class="language-plaintext highlighter-rouge">i2cdetect &lt;device-number&gt;</code> (you can get device list using <code class="language-plaintext highlighter-rouge">i2cdetect -l</code>):</p>

<div class="language-plaintext highlighter-rouge"><div class="highlight"><pre class="highlight"><code>I will probe file /dev/i2c-9.
I will probe address range 0x08-0x77.
Continue? [Y/n] y
     0  1  2  3  4  5  6  7  8  9  a  b  c  d  e  f
00:                         08 -- -- -- 0c -- -- -- 
10: -- -- -- -- -- 15 -- -- -- -- -- -- -- -- -- -- 
20: -- -- -- -- -- -- -- 27 -- -- -- -- -- -- -- -- 
30: 30 31 -- -- 34 35 -- -- -- -- -- -- -- -- -- -- 
40: -- -- -- -- -- -- -- -- -- -- -- -- -- -- -- 4f 
50: 50 51 52 53 -- -- -- -- -- -- -- -- -- -- -- -- 
60: -- -- -- -- -- -- -- -- 68 -- -- -- -- -- -- -- 
70: -- -- -- -- -- -- -- -- 
</code></pre></div></div>

<p>As we see, <code class="language-plaintext highlighter-rouge">0x27</code> address is used for HyperX RGB API, but here we found an another address range <code class="language-plaintext highlighter-rouge">0x30 - 0x31</code> and <code class="language-plaintext highlighter-rouge">0x34 - 0x35</code>, which <em>theoretically</em> can be used for read operations. Write operations are likely disabled.</p>

<p>Right here we are going to apply color correction to mitigate the dimming effect</p>

<h2 id="i2c-commands">I2C Commands</h2>

<p>Most of the job has been done by OpenRGB developers: they managed to reverse-engineer HyperX protocol. The list of commands can be found here: <a href="https://gitlab.com/OpenRGBDevelopers/OpenRGB-Wiki/-/blob/stable/Device-Documentation/HyperX-Predator-RGB.md">OpenRGB Documentation</a></p>

<p>All messages are sent using the format <code class="language-plaintext highlighter-rouge">Packet start -&gt; List of commands -&gt; Packet end -&gt; Apply</code></p>

<p>Firstly, we need to set the mode (it’s global for all sticks):</p>

<div class="language-bash highlighter-rouge"><div class="highlight"><pre class="highlight"><code>i2cset <span class="nt">-y</span> <span class="nv">$I2C_DEV</span> <span class="nv">$ADDR</span> 0xe1 0x01 <span class="c"># Start of message</span>
i2cset <span class="nt">-y</span> <span class="nv">$I2C_DEV</span> <span class="nv">$ADDR</span> 0xe5 0x21 <span class="c"># Mode Control 3, selected mode : Direct</span>
i2cset <span class="nt">-y</span> <span class="nv">$I2C_DEV</span> <span class="nv">$ADDR</span> 0xe1 0x02 <span class="c"># End of message</span>
i2cset <span class="nt">-y</span> <span class="nv">$I2C_DEV</span> <span class="nv">$ADDR</span> 0xe1 0x03 <span class="c"># Apply</span>
</code></pre></div></div>

<p>We have selected Direct per-led mode, so we can set each led individually. Here comes the hard part: we need to convert each slot and led position to i2c write command with “address”. It’s not a physical i2c address, but rather an internal mapping in HyperX protocol.</p>

<div class="language-bash highlighter-rouge"><div class="highlight"><pre class="highlight"><code>get_rgb_index<span class="o">()</span> <span class="o">{</span>
        <span class="c"># Get hex address of each led from zone 0..3, led 0..4 and channel 0..2</span>
        <span class="nv">IND</span><span class="o">=</span><span class="s2">"0x</span><span class="si">$(</span><span class="nb">printf</span> <span class="s1">'%X'</span> <span class="k">$((</span><span class="m">0</span>x11+<span class="nv">$1</span><span class="o">*</span><span class="m">0</span>x30+<span class="nv">$2</span><span class="o">*</span><span class="m">3</span><span class="o">+</span><span class="nv">$3</span><span class="k">))</span><span class="si">)</span><span class="s2">"</span>
<span class="o">}</span>

get_bri_index<span class="o">()</span> <span class="o">{</span>
        <span class="c"># Get hex address of brightness for led from zone 0..3 and led 0..4</span>
        <span class="nv">IND</span><span class="o">=</span><span class="s2">"0x</span><span class="si">$(</span><span class="nb">printf</span> <span class="s1">'%X'</span> <span class="k">$((</span><span class="m">0</span>x21+0x30<span class="o">*</span><span class="nv">$1</span><span class="o">+</span><span class="nv">$2</span><span class="o">*</span><span class="m">3</span><span class="k">))</span><span class="si">)</span><span class="s2">"</span>
<span class="o">}</span>
</code></pre></div></div>

<p>Luckily, the formula is pretty simple: if we iterate over <code class="language-plaintext highlighter-rouge">0x11 - 0x1f</code> range, we will get all channels for the first slot in repeating <code class="language-plaintext highlighter-rouge">R-G-B R-G-B R-G-B</code> pattern. Brightness is set in the next 5 commands for each led. Beginning of each zone is spaced each <code class="language-plaintext highlighter-rouge">0x30</code> commands. The protocol supports up to 4 slots</p>

<h2 id="color-correction">Color correction</h2>

<p>We need to apply two color corrections: for the blue channel and for red and green channels separately. We can match the brightness of blue channel between the zones and then correct the brightness of other channels - essentially, we are going to adjust the white balance.</p>

<p>Correction for the blue channel can be done simply by multiplying it by some constant.</p>

<p>R,G channels correction is trickier: we need to map them from <code class="language-plaintext highlighter-rouge">0-0xff</code> to <code class="language-plaintext highlighter-rouge">0-dim_coeff*blue_ratio</code>, where <code class="language-plaintext highlighter-rouge">blue_ratio</code> is the inversed brightness of blue channel after correction. Using this formula, we can set all zones to full brightness if blue channel is set to 0 and limit them to the brightness of the blue channel if it’s equal to <code class="language-plaintext highlighter-rouge">0xff</code>.</p>

<div class="language-bash highlighter-rouge"><div class="highlight"><pre class="highlight"><code>color_corr<span class="o">()</span> <span class="o">{</span>
        <span class="c"># Color correction for R and G channels, arguments: color, blue_corr</span>
        <span class="nv">CORR_INT</span><span class="o">=</span><span class="k">$((</span> <span class="o">((</span><span class="m">0</span>x3F <span class="o">-</span> <span class="nv">$2</span> <span class="o">+</span> <span class="nv">$COLOR_CORR_MAX</span><span class="o">)</span> <span class="o">*</span> <span class="nv">$1</span><span class="o">)</span> <span class="o">/</span> <span class="m">0</span>xFF <span class="k">))</span>
        <span class="c"># (b_min*(c_max-c)+b_max(c-c_min))/(c_max-c_min)</span>
        <span class="k">if</span> <span class="o">[[</span> <span class="nv">$CORR_INT</span> <span class="nt">-lt</span> 0 <span class="o">]]</span><span class="p">;</span> <span class="k">then </span><span class="nv">COL</span><span class="o">=</span><span class="s2">"0x00"</span>
        <span class="k">else
                if</span> <span class="o">[[</span> <span class="nv">$CORR_INT</span> <span class="nt">-gt</span> 255 <span class="o">]]</span><span class="p">;</span> <span class="k">then </span><span class="nv">COL</span><span class="o">=</span><span class="s2">"0xFF"</span>
                <span class="k">else </span><span class="nv">COL</span><span class="o">=</span>0x<span class="s2">"</span><span class="si">$(</span><span class="nb">printf</span> <span class="s1">'%X'</span> <span class="nv">$CORR_INT</span><span class="si">)</span><span class="s2">"</span>
                <span class="k">fi
        fi</span>
<span class="o">}</span>
</code></pre></div></div>

<p>Theoretically, a simple <code class="language-plaintext highlighter-rouge">lerp</code> may not be the best solution for color correction, so this formula may need to be replaced with some smoothing function like a bezier curve.</p>

<h2 id="running-the-script">Running the script</h2>

<p>Before running the script, make sure that the <code class="language-plaintext highlighter-rouge">i2c-tools</code> package is installed and <code class="language-plaintext highlighter-rouge">ee1004</code> module is unloaded.</p>

<p>Don’t forget to set <code class="language-plaintext highlighter-rouge">I2C_DEV</code> to the device address (may be found in OpenRGB device properties and using <code class="language-plaintext highlighter-rouge">i2cdetect -l</code>)</p>

<p>Simply clone the repository and run <code class="language-plaintext highlighter-rouge">hyperx_ram_rgb.sh</code> script</p>

<p>The first parameter is the hex code of the color (<code class="language-plaintext highlighter-rouge">#ffffff</code>), and the second one is the brightness (you may set it to <code class="language-plaintext highlighter-rouge">0xff</code>)</p>

<hr />

<p><strong>So.. it seems that we have a win!</strong> Although we get a significant decrease in brightness on max blue channel, the colors are pretty accurate.. But something is telling me that the bash script is not good enough, we need a better tool…</p>

<h2 id="openrgb-plugin">OpenRGB Plugin</h2>

<p>WIP!</p>

<h2 id="links">Links</h2>

<p>HyperX i2c commands (OpenRGB): <a href="https://gitlab.com/OpenRGBDevelopers/OpenRGB-Wiki/-/blob/stable/Device-Documentation/HyperX-Predator-RGB.md">OpenRGB Documentation</a></p>

<p>SPD Wikipedia article: <a href="https://en.wikipedia.org/wiki/Serial_presence_detect">https://en.wikipedia.org/wiki/Serial_presence_detect</a></p>

<p>DDR4 SDRAM Datasheet: <a href="https://docs.rs-online.com/6ecf/0900766b81641250.pdf">https://docs.rs-online.com/6ecf/0900766b81641250.pdf</a></p>]]></content><author><name></name></author><summary type="html"><![CDATA[]]></summary><media:thumbnail xmlns:media="http://search.yahoo.com/mrss/" url="https://enaix.github.io/assets/img/rgb_banner.jpg" /><media:content medium="image" url="https://enaix.github.io/assets/img/rgb_banner.jpg" xmlns:media="http://search.yahoo.com/mrss/" /></entry><entry><title type="html">Patching chinese adware from Kirikiroid2 apk</title><link href="https://enaix.github.io/decompilation/smali/2024/02/10/patching-kirikiroid2.html" rel="alternate" type="text/html" title="Patching chinese adware from Kirikiroid2 apk" /><published>2024-02-10T00:00:00+00:00</published><updated>2024-02-10T00:00:00+00:00</updated><id>https://enaix.github.io/decompilation/smali/2024/02/10/patching-kirikiroid2</id><content type="html" xml:base="https://enaix.github.io/decompilation/smali/2024/02/10/patching-kirikiroid2.html"><![CDATA[<p><img src="/assets/img/spy_shawk.png" alt="spy shawk" /></p>

<p><a href="https://github.com/zeas2/Kirikiroid2">Kirikiroid2</a> is an awesome opensource Kirikiri engine emulator for android, but there is a problem: the provided apk on Github is different from the one that <em>could</em> be built from source. While the source code is perfectly fine, the apk contains <code class="language-plaintext highlighter-rouge">Android.Waps</code> adware. The problem is that recompiling the source is problematic due to the lack of certain source files and dependency issues. <a href="https://github.com/YuriSizuku/Kirikiroid2Yuri">Kirikiroid2Yuri</a> project attempts to solve this issue, but the rebuilt apk is still in beta. The author also published a tweaked version of the original apk, which will also be patched.</p>

<p>You may find APK files at <a href="https://github.com/enaix/Kirikiroid2-debloated">Github</a></p>

<h3 id="note-the-apk-has-also-been-patched-to-run-on-android-14">Note: the apk has also been patched to run on Android 14!</h3>

<h2 id="overview">Overview</h2>

<p>There are 2 available files: original <code class="language-plaintext highlighter-rouge">Kirikiroid2_1.3.9.apk</code> and patched <code class="language-plaintext highlighter-rouge">Kirikiroid2_yuri_1.3.9.apk</code>. We will be covering only the first one, because the differences are minimal.</p>

<p>In order to decompile the apk, we are using <a href="https://github.com/iBotPeaches/Apktool">Apktool</a>. This utility unpacks the .apk file and converts the <code class="language-plaintext highlighter-rouge">.dex</code>/<code class="language-plaintext highlighter-rouge">.odex</code> files into readable <code class="language-plaintext highlighter-rouge">smali</code> code. <code class="language-plaintext highlighter-rouge">.dex</code> file is the bytecode for the Dalvik/ART virtual machine that is used in Android. Google doesn’t use original Java virtual machine due to cpu and memory limitations on mobile, which is quite reasonable. You can think of <code class="language-plaintext highlighter-rouge">.dex</code> code as some kind of assembler that is executed on a interpreter rather than hardware. Reading opcodes is not practical, so why we need to convert them to some human readable format: <code class="language-plaintext highlighter-rouge">smali</code>. It’s similar to disassembling binary files into readable assembler.</p>

<p>Note that I’m not an Android/Java developer and have no prior experience in modifying apk files. It’s better to read <a href="https://payatu.com/blog/an-introduction-to-smali/">intro to Smali</a> first, scroll down to find more links on app decompilation.</p>

<h2 id="tools">Tools</h2>

<ul>
  <li>Java Development Kit (JDK)</li>
  <li><a href="https://github.com/iBotPeaches/Apktool">Apktool</a></li>
  <li>Some text editor or IDE (I’m using Intellij IDEA with smali plugin)</li>
  <li>(Optional) Android sdk for apk optimization</li>
</ul>

<h2 id="decompilation">Decompilation</h2>

<p>Note: replace the apk name with either <code class="language-plaintext highlighter-rouge">Kirikiroid2_yuri_1.3.9.apk</code> if needed.</p>

<p>In order to decompile the apk, we need to run <code class="language-plaintext highlighter-rouge">apktool</code>:</p>

<p><code class="language-plaintext highlighter-rouge">java -jar apktool_2.9.3.jar d Kirikiroid2_1.3.9.apk -o kiri2_src/</code></p>

<p><code class="language-plaintext highlighter-rouge">cd kiri2_src</code></p>

<div class="language-plaintext highlighter-rouge"><div class="highlight"><pre class="highlight"><code>AndroidManifest.xml assets              original            smali
apktool.yml         lib                 res
</code></pre></div></div>

<p>Now we have the project ready. The project structure consists of manifest file (main apk options), assets and resources (assets, lib, res, original), apktool config (no need to modify) and smali files. Java class hierarchy is preserved, such that class <code class="language-plaintext highlighter-rouge">a.b.c</code> is stored in <code class="language-plaintext highlighter-rouge">smali/a/b/c.smali</code>.</p>

<h3 id="project-structure">Project structure</h3>

<div class="language-plaintext highlighter-rouge"><div class="highlight"><pre class="highlight"><code>smali
├── a
│   └── un.smali
├── android     # Android comon libraries
│   ├── net
│   └── support
├── b
│   └── a
├── cn
│   └── waps    # Adware that we need to purge
├── com         # Some libraries
│   ├── android
│   ├── enhance
│   └── loopj
└── org         # 3 libraries and kirikiri2 sources
    ├── apache
    ├── cocos2dx
    ├── libsdl
    └── tvp     # Main source code
</code></pre></div></div>

<p>From here we can see that the main task is to remove all usages of <code class="language-plaintext highlighter-rouge">cn.waps.*</code> from <code class="language-plaintext highlighter-rouge">org.tvp.*</code> classes and just remove the <code class="language-plaintext highlighter-rouge">cn</code> folder altogether. Theoretically, we could take another approach and modify <code class="language-plaintext highlighter-rouge">cn.waps</code> functions to the point where it’s harmless, but that would be quite hard.</p>

<p>Let’s take a look at <code class="language-plaintext highlighter-rouge">org/tvp/</code> sources:</p>

<div class="language-plaintext highlighter-rouge"><div class="highlight"><pre class="highlight"><code>smali/org/tvp
├── kirikiri2
│   ├── DummyEdit.smali
│   ├── KR2Activity$1.smali
│   ├── KR2Activity$2.smali
│   ├── KR2Activity$3.smali
│   ├── KR2Activity$4.smali
│   ├── KR2Activity$5.smali
│   ├── KR2Activity$6.smali
│   ├── KR2Activity$7.smali
│   ├── KR2Activity$DialogMessage$1.smali
│   ├── KR2Activity$DialogMessage$2.smali
│   ├── KR2Activity$DialogMessage$3.smali
│   ├── KR2Activity$DialogMessage$4.smali
│   ├── KR2Activity$DialogMessage.smali
│   ├── KR2Activity$KR2GLSurfaceView.smali
│   ├── KR2Activity$ShowTextInputTask.smali
│   ├── KR2Activity.smali    # &lt;-
│   ├── MediaStoreHack.smali
│   ├── MediaStoreUtil.smali
│   └── SDLInputConnection.smali
└── kirikiri2_free_10309
    ├── BuildConfig.smali
    ├── Kirikiroid2.smali    # &lt;-
    ├── R$attr.smali
    ├── R$dimen.smali
    ├── R$drawable.smali
    ├── R$integer.smali
    ├── R$raw.smali
    ├── R$string.smali
    └── R.smali
</code></pre></div></div>

<p>Here the main source files are <code class="language-plaintext highlighter-rouge">Kirikiroid2.smali</code> and <code class="language-plaintext highlighter-rouge">KR2Activity.smali</code>. Actually, it would be interesting to analyze other files aswell, but the post would be way too long.</p>

<h3 id="analyzing-kirikiroid2-source-code">Analyzing Kirikiroid2 source code</h3>

<p>By using <code class="language-plaintext highlighter-rouge">Find in files</code> -&gt; <code class="language-plaintext highlighter-rouge">waps</code> I’ve checked that the adware is only called from <code class="language-plaintext highlighter-rouge">Kirikiroid2.smali</code> file.</p>

<p>The first function that uses <code class="language-plaintext highlighter-rouge">cn.waps</code> is handleMessage.</p>

<div class="language-plaintext highlighter-rouge"><div class="highlight"><pre class="highlight"><code>.method public handleMessage(Landroid/os/Message;)V
    .locals 6
    .param p1, "msg"    # Landroid/os/Message;

    .prologue
    const/4 v3, 0x1

    .line 91
    iget v4, p1, Landroid/os/Message;-&gt;what:I

    const v5, 0x10001

    if-ne v4, v5, :cond_2

    .line 92
    iget v3, p1, Landroid/os/Message;-&gt;arg1:I

    if-eqz v3, :cond_1

    .line 93    # &lt;- 93
    invoke-static {p0}, Lcn/waps/AppConnect;-&gt;getInstance(Landroid/content/Context;)Lcn/waps/AppConnect;

    move-result-object v3

    # &lt;- next line
    invoke-virtual {v3, p0}, Lcn/waps/AppConnect;-&gt;showPopAd(Landroid/content/Context;)V
    
    # ...

    goto :goto_0
.end method
</code></pre></div></div>

<p>If we check the beginning of the function, we can see that this method takes <code class="language-plaintext highlighter-rouge">android/os/Message</code> and returns <code class="language-plaintext highlighter-rouge">V</code> - <code class="language-plaintext highlighter-rouge">void</code> type. Let’s analyze line 93:</p>

<p><code class="language-plaintext highlighter-rouge">invoke-static {p0}</code> means that we are calling a static method, while passing a register <code class="language-plaintext highlighter-rouge">p0</code>.</p>

<p><code class="language-plaintext highlighter-rouge">Lcn/waps/AppConnect;</code> calls the AppConnect class and <code class="language-plaintext highlighter-rouge">-&gt;getInstance(Landroid/content/Context;)Lcn/waps/AppConnect</code> mentions the exact method to call. So this line gets the instance of the adware class to work with.</p>

<p>The next line calls a virtual method <code class="language-plaintext highlighter-rouge">showPopAd</code>. It seems that this adware has builtin code to display ads, huh..</p>

<p>Since this function is not present in the original source code and is redefined in some other parts of the project, it’s likely that the author made it to be quickly addable and removable. In other words, we can simply remove this function and the app would compile.</p>

<p>Other functions <code class="language-plaintext highlighter-rouge">.method public onCreate(Landroid/os/Bundle;)V</code>, <code class="language-plaintext highlighter-rouge">.method public onDestroy()V</code> and <code class="language-plaintext highlighter-rouge">.method showBannerAd(Z)V</code> act the same and can be safely removed.</p>

<p><code class="language-plaintext highlighter-rouge">onDestroy</code> is likely to be a destructor, we should double check it to avoid memory leaks:</p>

<div class="language-plaintext highlighter-rouge"><div class="highlight"><pre class="highlight"><code>.method public onDestroy()V
    .locals 1  # we use 1 local register

    .prologue  # for debug
    .line 80
    invoke-static {p0}, Lcn/waps/AppConnect;-&gt;getInstance(Landroid/content/Context;)Lcn/waps/AppConnect;

    move-result-object v0

    invoke-virtual {v0}, Lcn/waps/AppConnect;-&gt;close()V

    .line 81
    return-void
.end method
</code></pre></div></div>

<p>Here we use 1 local register v0 (the VM needs to know how many of them to reserve)</p>

<p>We pass first argument <code class="language-plaintext highlighter-rouge">p0</code> to <code class="language-plaintext highlighter-rouge">getInstance</code> in order to get the current adware instance, then assign the result to <code class="language-plaintext highlighter-rouge">v0</code> register and call <code class="language-plaintext highlighter-rouge">close</code> in order to stop the instance.</p>

<p>If we take a look at the <a href="https://github.com/zeas2/Kirikiroid2/blob/master/project/android/src/org/tvp/kirikiri2/Kirikiroid2.java">published source file</a>, we see that the method may look something like that:</p>

<div class="language-java highlighter-rouge"><div class="highlight"><pre class="highlight"><code>
<span class="nd">@Override</span>
<span class="kd">public</span> <span class="kt">void</span> <span class="nf">onDestroy</span><span class="o">()</span>
<span class="o">{</span>
    <span class="nc">AppConnect</span> <span class="n">instance</span> <span class="o">=</span> <span class="n">getInstance</span><span class="o">(</span><span class="k">this</span><span class="o">);</span>
    <span class="n">instance</span><span class="o">.</span><span class="na">close</span><span class="o">();</span>
<span class="o">}</span>
</code></pre></div></div>

<p>We may also remove this function, because no adware instance is being created.</p>

<p>At this point we may delete the <code class="language-plaintext highlighter-rouge">cn</code> directory, since there are no other mentions in the project.</p>

<h3 id="final-modifications">Final modifications</h3>

<p>I have found another concerning function that I would like to patch: <code class="language-plaintext highlighter-rouge">KR2Activity.smali:1206</code></p>

<div class="language-plaintext highlighter-rouge"><div class="highlight"><pre class="highlight"><code>.method public static getDeviceId()Ljava/lang/String;
    .locals 5

    .prologue
    .line 272
    invoke-static {}, Lorg/tvp/kirikiri2/KR2Activity;-&gt;GetInstance()Lorg/tvp/kirikiri2/KR2Activity;

    move-result-object v3

    const-string v4, "phone"

    # ...

    goto :goto_0
.end method
</code></pre></div></div>

<p>This one obtains the device id, which is usually used for advertising purposes, it makes sense to return zeros. Here the functions returns <code class="language-plaintext highlighter-rouge">java/lang/String</code>, so we may just return “0000000000000000”.</p>

<p>We may just append</p>
<div class="language-plaintext highlighter-rouge"><div class="highlight"><pre class="highlight"><code>const-string v0, "0000000000000000"
return-object v0
</code></pre></div></div>
<p>after <code class="language-plaintext highlighter-rouge">.line 272</code> directive and the function would return early.</p>

<h2 id="recompilation">Recompilation</h2>

<p>Run <code class="language-plaintext highlighter-rouge">cd ..</code> to exit the <code class="language-plaintext highlighter-rouge">kiri2_src</code> directory and run</p>

<p><code class="language-plaintext highlighter-rouge">java -jar apktool_2.9.3.jar b kiri2_src</code></p>

<p>to rebuild the project. Next we would need to sign the apk with our own certificate:</p>

<p>Generate the signing key if needed (once):</p>

<p><code class="language-plaintext highlighter-rouge">keytool -genkey -v -keystore &lt;filename&gt;.keystore -keyalg RSA -keysize 2048 -validity 10000 -alias &lt;alias&gt;</code></p>

<p>Sign the apk:</p>

<p><code class="language-plaintext highlighter-rouge">jarsigner -verbose -sigalg SHA1withRSA -digestalg SHA1 -keystore &lt;path-to-key&gt; ./kiri2_src/dist/Kirikiroid2_1.3.9.apk &lt;alias&gt;</code></p>

<p>We may optionally call zipalign to optimize the apk file:</p>

<p><code class="language-plaintext highlighter-rouge">/path/to/android-sdk/bin/build-tools/*/zipalign -p -f -v 4 kiri2_src/dist/Kirikiroid2_1.3.9.apk kiri2_src/dist/Kirikiroid2_1.3.9_debloated.apk</code></p>

<h2 id="results">Results</h2>

<p>We have obtained the apk file that runs and is not flagged on virustotal, unlike the original ones. I’ve changed the application name in apktool.yml file in order to avoid the package name conflict. If the original apk crashes, please use yuri version with bugfixes.</p>

<p><strong>APK and project files are available at <a href="https://github.com/enaix/Kirikiroid2-debloated">Github</a></strong></p>

<p>Unfortunately, analyzing the adware code is beyond the scope of this article, since it’s obfuscated, but I may try doing that later.</p>

<h2 id="links">Links</h2>

<p>Intro to smali: <a href="https://payatu.com/blog/an-introduction-to-smali/">https://payatu.com/blog/an-introduction-to-smali/</a></p>

<p>Essential info on smali (multiple links in the top answer): <a href="https://stackoverflow.com/questions/5656804/whats-the-best-way-to-learn-smali-and-how-when-to-use-dalvik-vm-opcodes">Stackoverflow question</a></p>

<p>Smali cheatsheet, not quite readable: <a href="https://gist.github.com/AadilGillani/8c5690ebbaceda2914f9dc37197bd154">github gist</a></p>]]></content><author><name></name></author><category term="decompilation" /><category term="smali" /><summary type="html"><![CDATA[]]></summary><media:thumbnail xmlns:media="http://search.yahoo.com/mrss/" url="https://enaix.github.io/assets/img/spy_shawk.png" /><media:content medium="image" url="https://enaix.github.io/assets/img/spy_shawk.png" xmlns:media="http://search.yahoo.com/mrss/" /></entry><entry><title type="html">Writing stylized dotted comic shader in Godot</title><link href="https://enaix.github.io/2023/10/02/dotted-cmyk-shader.html" rel="alternate" type="text/html" title="Writing stylized dotted comic shader in Godot" /><published>2023-10-02T14:26:32+00:00</published><updated>2023-10-02T14:26:32+00:00</updated><id>https://enaix.github.io/2023/10/02/dotted-cmyk-shader</id><content type="html" xml:base="https://enaix.github.io/2023/10/02/dotted-cmyk-shader.html"><![CDATA[<p><img src="/assets/img/dots/banner.png" alt="dot shader example" /></p>

<p>While playing around with Godot engine and shader programming I’ve developed some interestingly looking comic shader with ink-ish look. On this example I want to show you how to implement simple pop style dotted shaders.</p>

<p><strong>It is recommended to read @dreadlocksdude’s shader tutorial first:</strong> <a href="https://medium.com/@dreadlocksdude/vfx-series-shaders-lesson-1-power-of-curves-9be476ba6e93">VFX shader series, lesson 1</a></p>

<p>Overall, this is an extremely important guide on understanding shader functions as building blocks. We will be heavily using such techniques in this guide.</p>

<h2 id="the-idea">The idea</h2>

<p>While watching the <a href="https://www.youtube.com/watch?v=VckU9UXI_XE">recent Posy video about dot matrix printing</a>, I’ve decided to implement a shader that contained blending CMYK dots in the screen space, such that the image is perpendicular towards the camera (unlike the textures).</p>

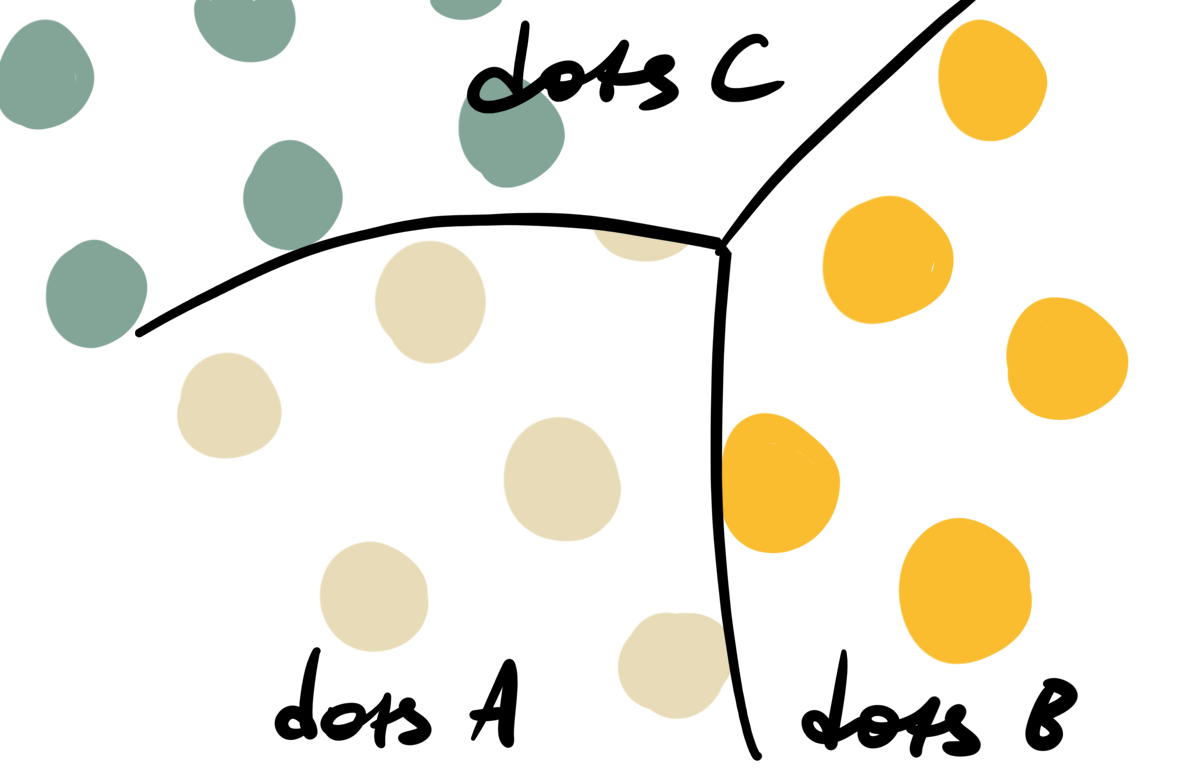
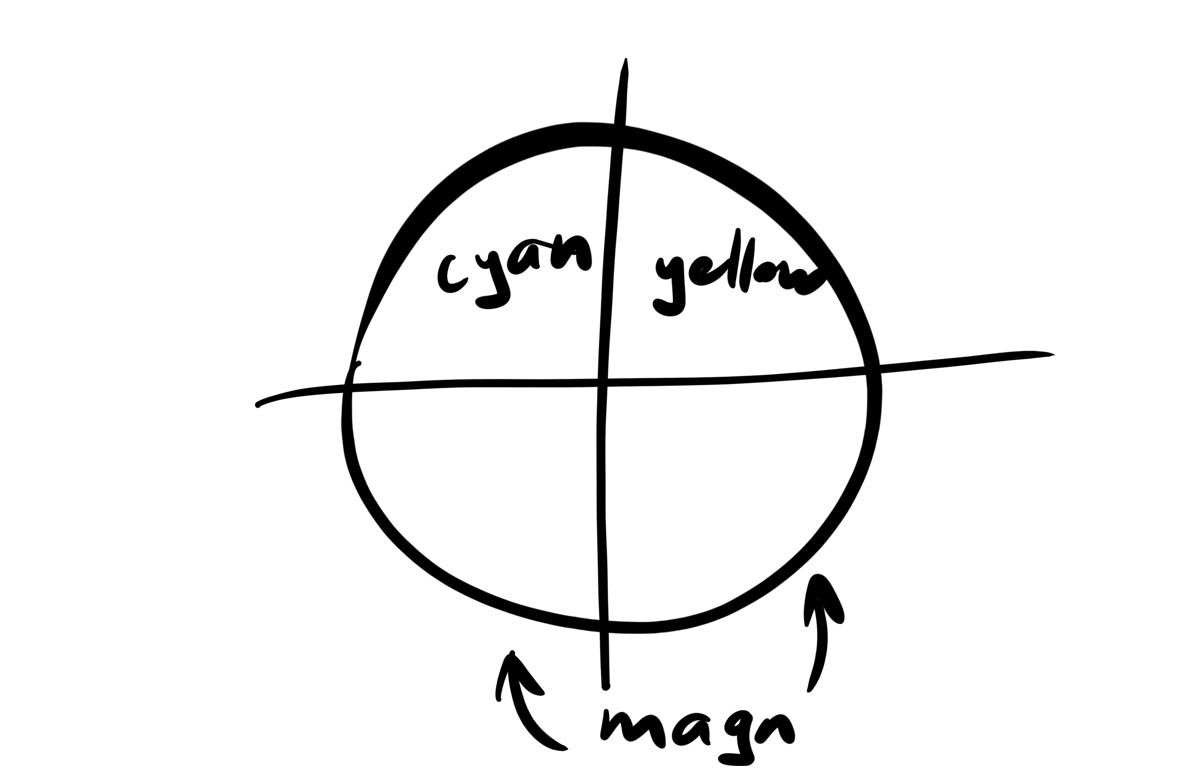
<p>In order to avoid unwanted rippling effects during the movement I’ve decided not to overlap the coloured dots, but split them into zones:</p>

<p><img src="/assets/img/dots/dots1.png" alt="cmyk dots shader" /></p>

<p>So, we will pick the zones, determine the corresponding color, perform some preprocessing effects and render the dots.</p>

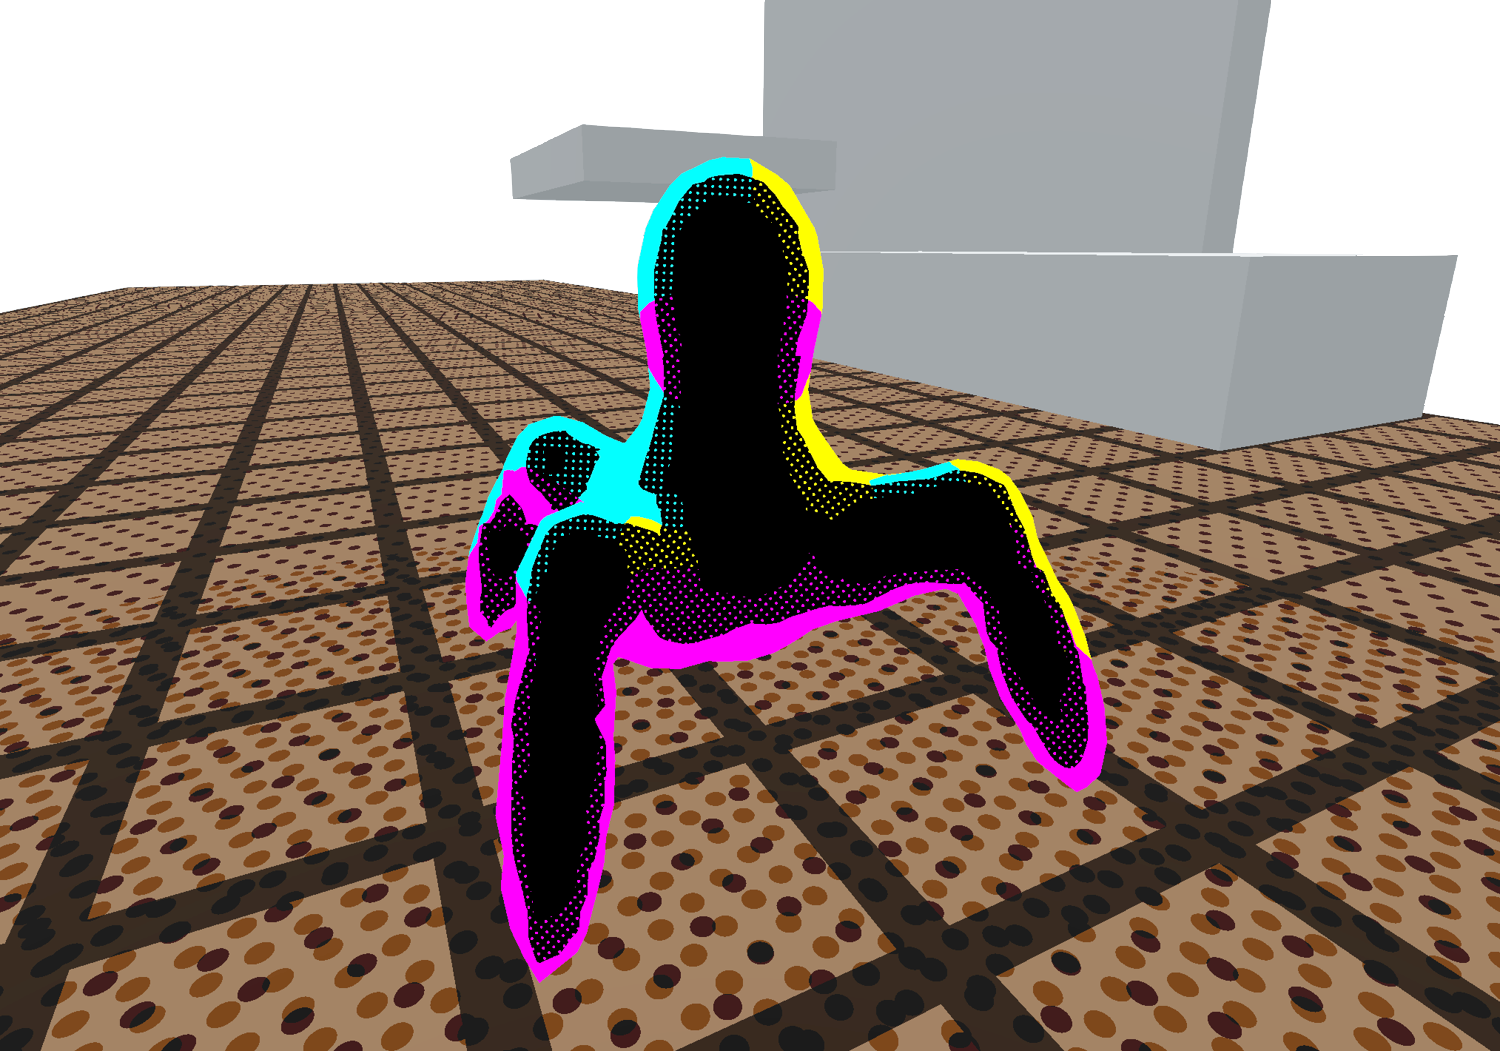
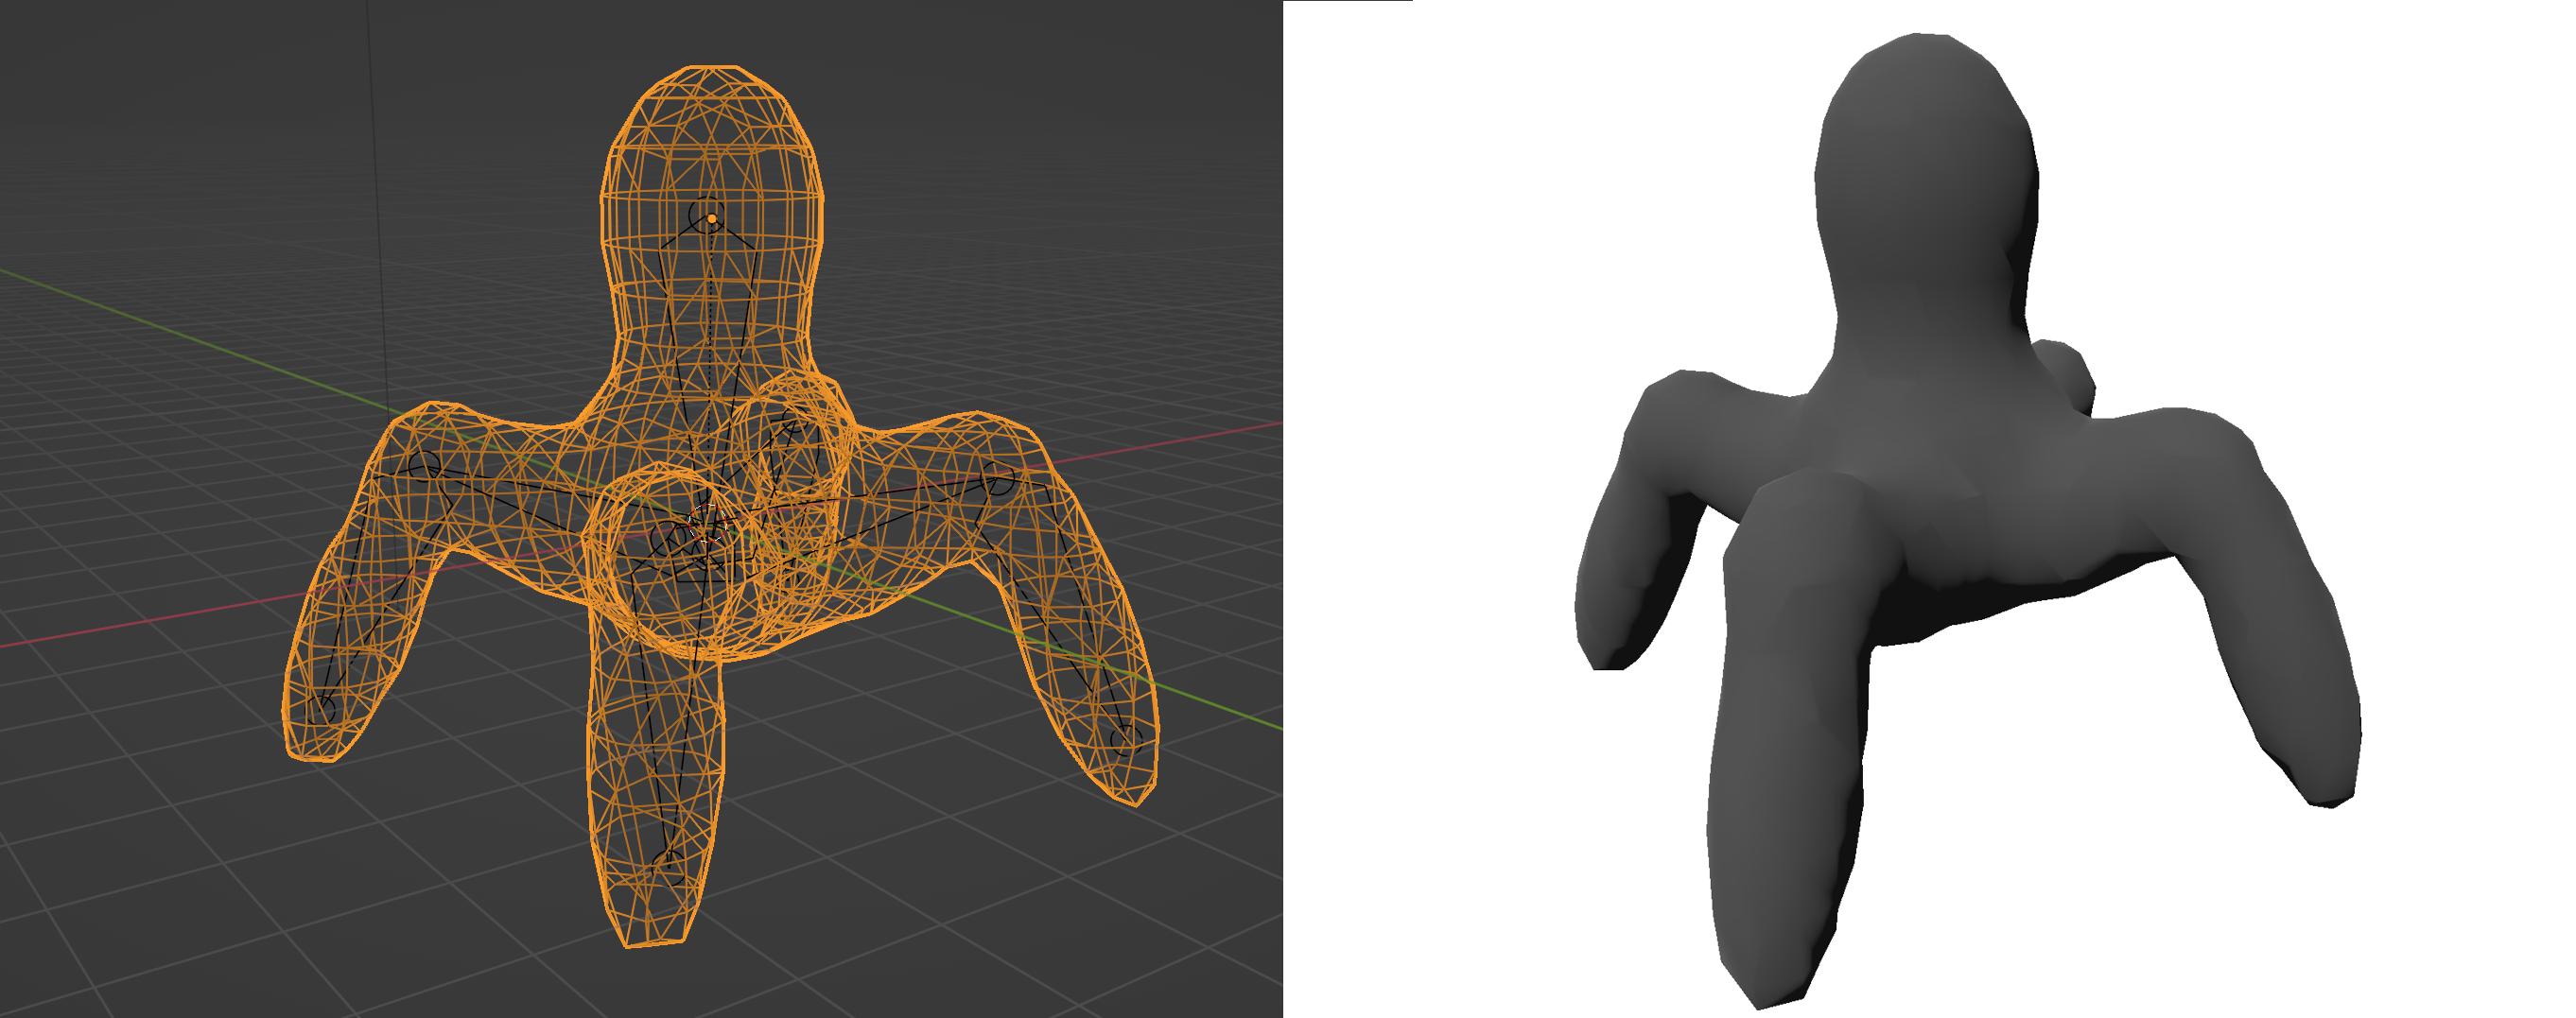
<p>As for the test mesh, I will be using the metaball spider model, as this shader looks best on organic surfaces.</p>

<p><img src="/assets/img/dots/spider1.jpg" alt="metaball spider model" /></p>

<h2 id="dots-function">Dots function</h2>

<p>In order to create the shader, we need to develop the dots function first that returns the color based on position, zone color, background color and rotation of the field.</p>

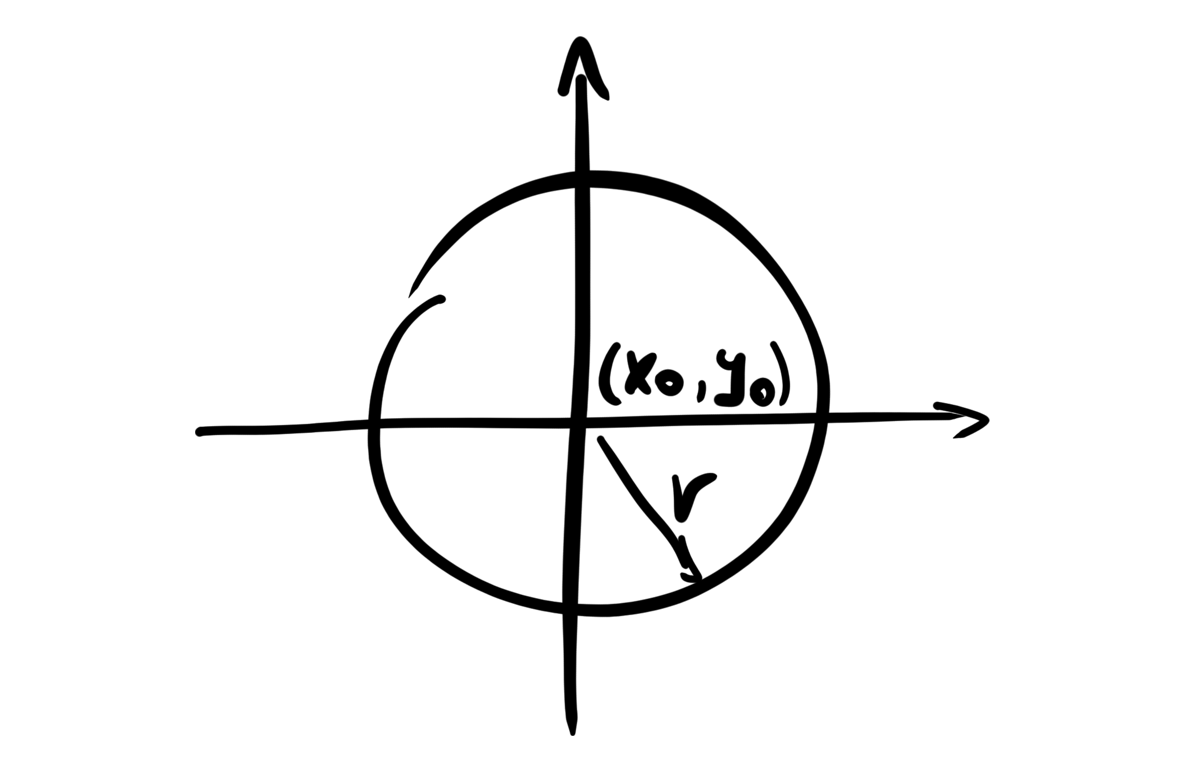
<p>Firstly, we need to get the formula for the dot in order to determine if we need to return the background color or the color of the dot. This is a simple formula for the ellipse with the origin at \((x_0, y_0)\)</p>

<p><img src="/assets/img/dots/dots2.png" alt="dots shader function 1" /></p>

\[\begin{cases}
\text{dot}, (x-x_0)^2 + (y-y_0)^2 \le r^2 \\
\text{background}, \text{otherwise}
\end{cases}\]

<div class="language-glsl highlighter-rouge"><div class="highlight"><pre class="highlight"><code>
<span class="kt">vec3</span> <span class="nf">dots</span><span class="p">(</span><span class="kt">vec2</span> <span class="n">pos</span><span class="p">,</span> <span class="kt">vec3</span> <span class="n">dotcol</span><span class="p">,</span> <span class="kt">vec3</span> <span class="n">black</span><span class="p">,</span> <span class="kt">float</span> <span class="n">a</span><span class="p">)</span>
<span class="p">{</span>
    <span class="k">if</span> <span class="p">(</span><span class="n">pow</span><span class="p">(</span><span class="n">pos</span><span class="p">.</span><span class="n">x</span> <span class="o">-</span> <span class="n">dot_size</span><span class="p">,</span> <span class="mi">2</span><span class="p">)</span> <span class="o">+</span> <span class="n">pow</span><span class="p">(</span><span class="n">pos</span><span class="p">.</span><span class="n">y</span> <span class="o">-</span> <span class="n">dot_size</span><span class="p">,</span> <span class="mi">2</span><span class="p">)</span> <span class="o">&lt;=</span> <span class="n">dot_size</span><span class="o">*</span><span class="n">dot_size</span><span class="p">)</span>
    <span class="p">{</span>
        <span class="k">return</span> <span class="n">dotcol</span><span class="p">;</span>
    <span class="p">}</span>
    <span class="k">return</span> <span class="n">black</span><span class="p">;</span>
<span class="p">}</span>

</code></pre></div></div>

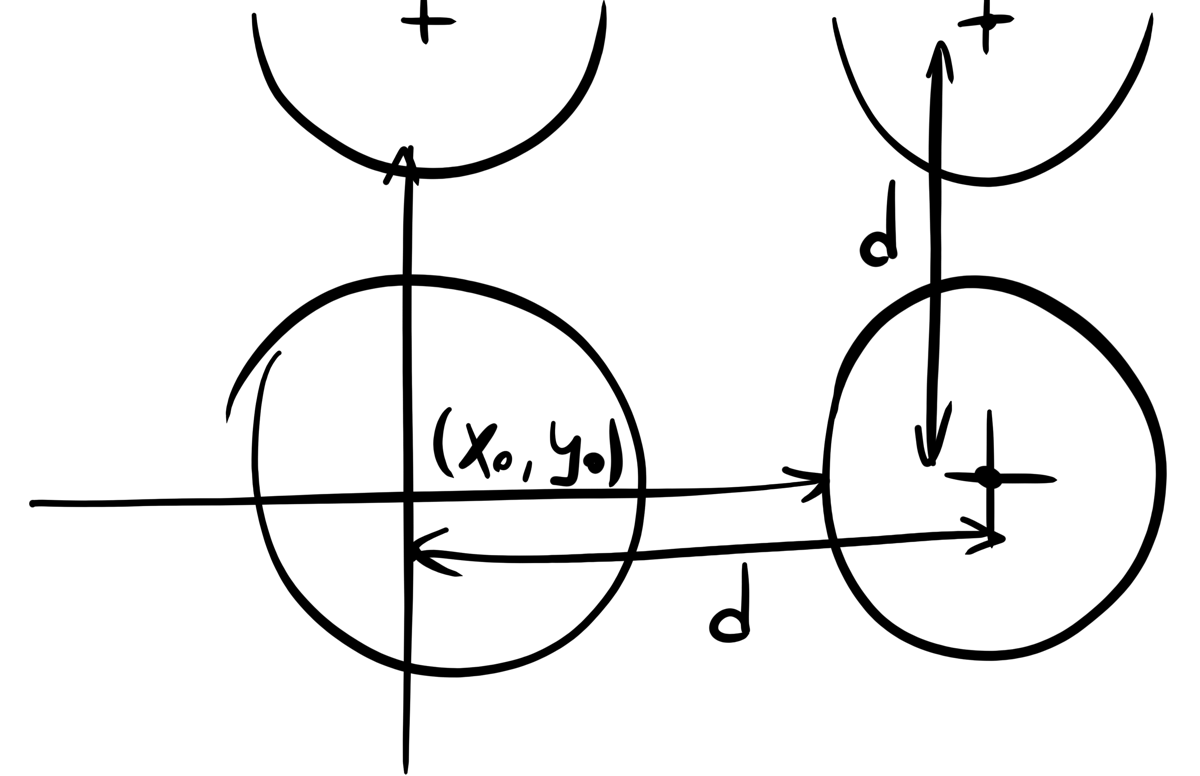
<p>This gives us the single dot at \((x_0, y_0)\), so we need to repeat the function along x and y axis to obtain the matrix of dots. The simpliest way to achieve this is by taking modulo from \(x\) and \(y\). <code class="language-plaintext highlighter-rouge">mod(x, n)</code> returns <code class="language-plaintext highlighter-rouge">(0, 1, 2, ..., n-1, 0, 1, 2, ...)</code>: if we pass the result of this function in the ellipse formula, we obtain the repetition of this ellipse with spacing n <strong>anywhere</strong> along the space. In the context of shaders, <code class="language-plaintext highlighter-rouge">mod</code> function takes floating point numbers aswell.</p>

<p><img src="/assets/img/dots/dots3.png" alt="dots shader function 2" /></p>

\[\begin{cases}
\text{dot}, (x \mod {d}-x_0)^2 + (y \mod {d}-y_0)^2 \le r^2 \\
\text{background}, \text{otherwise}
\end{cases}\]

<div class="language-glsl highlighter-rouge"><div class="highlight"><pre class="highlight"><code>
<span class="kt">vec3</span> <span class="nf">dots</span><span class="p">(</span><span class="kt">vec2</span> <span class="n">pos</span><span class="p">,</span> <span class="kt">vec3</span> <span class="n">dotcol</span><span class="p">,</span> <span class="kt">vec3</span> <span class="n">black</span><span class="p">,</span> <span class="kt">float</span> <span class="n">a</span><span class="p">)</span>
<span class="p">{</span>
    <span class="k">if</span> <span class="p">(</span><span class="n">pow</span><span class="p">(</span><span class="n">mod</span><span class="p">(</span><span class="n">pos</span><span class="p">.</span><span class="n">x</span><span class="p">,</span> <span class="n">dot_spacing</span><span class="p">)</span> <span class="o">-</span> <span class="n">dot_size</span><span class="p">,</span> <span class="mi">2</span><span class="p">)</span> <span class="o">+</span> <span class="n">pow</span><span class="p">(</span><span class="n">mod</span><span class="p">(</span><span class="n">pos</span><span class="p">.</span><span class="n">y</span><span class="p">,</span> <span class="n">dot_spacing</span><span class="p">)</span> <span class="o">-</span> <span class="n">dot_size</span><span class="p">,</span> <span class="mi">2</span><span class="p">)</span> <span class="o">&lt;=</span> <span class="n">dot_size</span><span class="o">*</span><span class="n">dot_size</span><span class="p">)</span>
    <span class="p">{</span>
        <span class="k">return</span> <span class="n">dotcol</span><span class="p">;</span>
    <span class="p">}</span>
    <span class="k">return</span> <span class="n">black</span><span class="p">;</span>
<span class="p">}</span>

</code></pre></div></div>

<p>The last point is the rotation of the dots. We want to rotate the whole space over the point \((0, 0)\), so we need to apply the <strong>transformation matrix</strong> to the position vector \((x, y)^T\). Note that angle \(a\) must be in radians.</p>

\[\begin{bmatrix}
\cos{a} &amp; \sin{a} \\
-\sin{a} &amp; \cos{a}
\end{bmatrix}
\begin{bmatrix}
x \\
y
\end{bmatrix}\]

<p>So we nonlinearly transform our position by some matrix and obtain new coordinates that we pass to our code as is.</p>

<div class="language-glsl highlighter-rouge"><div class="highlight"><pre class="highlight"><code>
<span class="kt">vec3</span> <span class="nf">dots</span><span class="p">(</span><span class="kt">vec2</span> <span class="n">pos</span><span class="p">,</span> <span class="kt">vec3</span> <span class="n">dotcol</span><span class="p">,</span> <span class="kt">vec3</span> <span class="n">black</span><span class="p">,</span> <span class="kt">float</span> <span class="n">a</span><span class="p">)</span>
<span class="p">{</span>
    <span class="n">pos</span> <span class="o">=</span> <span class="kt">mat2</span><span class="p">(</span><span class="kt">vec2</span><span class="p">(</span><span class="n">cos</span><span class="p">(</span><span class="n">a</span><span class="p">),</span> <span class="n">sin</span><span class="p">(</span><span class="n">a</span><span class="p">)),</span> <span class="kt">vec2</span><span class="p">(</span><span class="o">-</span><span class="n">sin</span><span class="p">(</span><span class="n">a</span><span class="p">),</span> <span class="n">cos</span><span class="p">(</span><span class="n">a</span><span class="p">)))</span> <span class="o">*</span> <span class="n">pos</span><span class="p">;</span>
    
    <span class="k">if</span> <span class="p">(</span><span class="n">pow</span><span class="p">(</span><span class="n">mod</span><span class="p">(</span><span class="n">pos</span><span class="p">.</span><span class="n">x</span><span class="p">,</span> <span class="n">dot_spacing</span><span class="p">)</span> <span class="o">-</span> <span class="n">dot_size</span><span class="p">,</span> <span class="mi">2</span><span class="p">)</span> <span class="o">+</span> <span class="n">pow</span><span class="p">(</span><span class="n">mod</span><span class="p">(</span><span class="n">pos</span><span class="p">.</span><span class="n">y</span><span class="p">,</span> <span class="n">dot_spacing</span><span class="p">)</span> <span class="o">-</span> <span class="n">dot_size</span><span class="p">,</span> <span class="mi">2</span><span class="p">)</span> <span class="o">&lt;=</span> <span class="n">dot_size</span><span class="o">*</span><span class="n">dot_size</span><span class="p">)</span>
    <span class="p">{</span>
        <span class="k">return</span> <span class="n">dotcol</span><span class="p">;</span>
    <span class="p">}</span>
    <span class="k">return</span> <span class="n">black</span><span class="p">;</span>
<span class="p">}</span>

</code></pre></div></div>

<h2 id="fragment-shader">Fragment shader</h2>

<p>Firstly, we need to define some uniform variables that can be tuned for each model.</p>

<div class="language-glsl highlighter-rouge"><div class="highlight"><pre class="highlight"><code>
<span class="n">shader_type</span> <span class="n">spatial</span><span class="p">;</span>

<span class="n">render_mode</span> <span class="n">unshaded</span><span class="p">;</span>

<span class="k">uniform</span> <span class="kt">float</span> <span class="n">power</span> <span class="o">=</span> <span class="mi">3</span><span class="p">;</span>  <span class="c1">// thickness of edge</span>

<span class="k">uniform</span> <span class="kt">float</span> <span class="n">dot_spacing</span> <span class="o">=</span> <span class="mi">10</span><span class="p">;</span>
<span class="k">uniform</span> <span class="kt">float</span> <span class="n">dot_size</span> <span class="o">=</span> <span class="mi">2</span><span class="p">;</span>
<span class="k">uniform</span> <span class="kt">float</span> <span class="n">angle</span> <span class="o">=</span> <span class="mi">45</span><span class="p">;</span>
<span class="c1">// ...</span>

</code></pre></div></div>

<p>It is important to define <code class="language-plaintext highlighter-rouge">render_mode unshaded</code> in order to override the color by disabling engine lighting and shading.</p>

<div class="language-glsl highlighter-rouge"><div class="highlight"><pre class="highlight"><code>
<span class="c1">// ...</span>
<span class="kt">void</span> <span class="nf">fragment</span><span class="p">()</span>
<span class="p">{</span>
    <span class="c1">// ...</span>
    <span class="n">ALBEDO</span> <span class="o">=</span> <span class="n">col</span><span class="p">;</span>
<span class="p">}</span>

</code></pre></div></div>

<p>So, we need to write <code class="language-plaintext highlighter-rouge">fragment</code> function that takes various parameters (vertex position, face normal, …) and sets the albedo (color) of the current fragment (sub-pixel).</p>

<h2 id="writing-a-simple-shader">Writing a simple shader</h2>

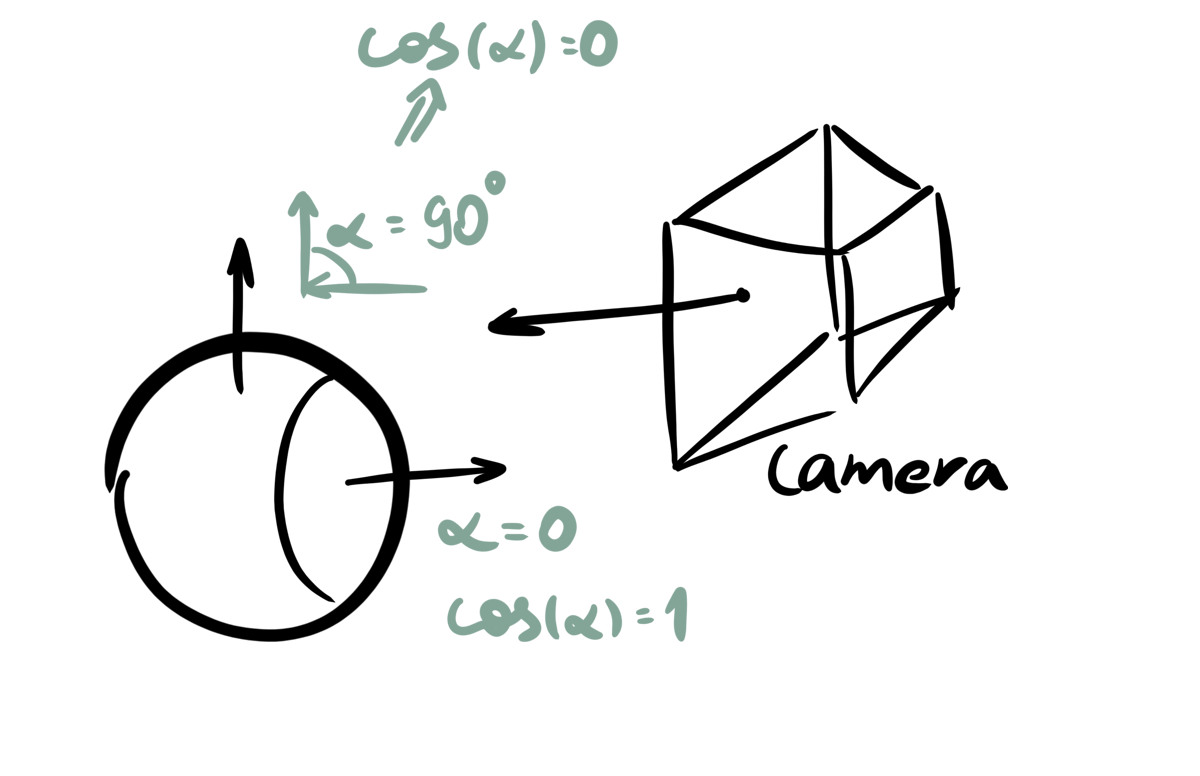
<p>After some theory we are finally going to write a simple dot shader. Our fragment function needs to find the edges of the model in order to paint the front facing parts of the model black. We may calculate the cosine of the angle between the camera and normal vector. In other words, we need the <strong>dot product</strong> between these vectors.</p>

<p><img src="/assets/img/dots/dots4.png" alt="dot shader explanation 1" /></p>

<div class="language-glsl highlighter-rouge"><div class="highlight"><pre class="highlight"><code>
<span class="kt">float</span> <span class="n">dist</span> <span class="o">=</span> <span class="n">pow</span><span class="p">(</span><span class="mi">1</span><span class="p">.</span><span class="mi">0</span> <span class="o">-</span> <span class="n">dot</span><span class="p">(</span><span class="n">NORMAL</span><span class="p">,</span> <span class="n">VIEW</span><span class="p">),</span> <span class="n">power</span><span class="p">);</span>
<span class="c1">// ...</span>

</code></pre></div></div>

<p>We need to subtract the cosine from 1 in order to get the distance to the edge. We don’t care about vector lengths as in dot product formula \(a \cdot b = \text{len } a \text{ len } b \cos{\theta}\), because <code class="language-plaintext highlighter-rouge">NORMAL</code> and <code class="language-plaintext highlighter-rouge">VIEW</code> vectors are normalized: their length is 1. Power of value sets the thickness of the edge.</p>

<p>Now, we need to get the color of the dots. I’ve decided to use the position of the fragment from camera to split the model into several zones. As a result, we can determine the CMYK color of each zone.</p>

<p><img src="/assets/img/dots/dots5.png" alt="dot shader explanation 2" /></p>

<p>In order to add some variation, we subtract it from the normal. There are better ways to do this, but the current code works fine.</p>

<div class="language-glsl highlighter-rouge"><div class="highlight"><pre class="highlight"><code>
<span class="c1">// ...</span>
<span class="n">col</span> <span class="o">=</span> <span class="kt">vec3</span><span class="p">(</span><span class="mi">0</span><span class="p">.</span><span class="mi">0</span><span class="p">,</span> <span class="mi">0</span><span class="p">.</span><span class="mi">0</span><span class="p">,</span> <span class="mi">0</span><span class="p">.</span><span class="mi">0</span><span class="p">);</span>  <span class="c1">// set the color to black</span>

<span class="k">if</span> <span class="p">(</span><span class="n">dist</span> <span class="o">&gt;</span> <span class="mi">0</span><span class="p">.</span><span class="mo">01</span><span class="p">)</span>  <span class="c1">// check for the edge</span>
<span class="p">{</span>
    <span class="n">col</span> <span class="o">=</span> <span class="kt">vec3</span><span class="p">(</span><span class="mi">0</span><span class="p">.</span><span class="mi">0</span><span class="p">,</span> <span class="mi">1</span><span class="p">.</span><span class="mi">0</span><span class="p">,</span> <span class="mi">1</span><span class="p">.</span><span class="mi">0</span><span class="p">);</span>  <span class="c1">// set the color to cyan</span>
    <span class="k">if</span> <span class="p">(</span><span class="n">NORMAL</span><span class="p">.</span><span class="n">x</span> <span class="o">-</span> <span class="n">VIEW</span><span class="p">.</span><span class="n">x</span> <span class="o">&gt;</span> <span class="mi">0</span><span class="p">.</span><span class="mi">0</span><span class="p">)</span> <span class="n">col</span> <span class="o">=</span> <span class="kt">vec3</span><span class="p">(</span><span class="mi">1</span><span class="p">.</span><span class="mi">0</span><span class="p">,</span> <span class="mi">1</span><span class="p">.</span><span class="mi">0</span><span class="p">,</span> <span class="mi">0</span><span class="p">.</span><span class="mi">0</span><span class="p">);</span>  <span class="c1">// yellow</span>
    <span class="k">if</span> <span class="p">(</span><span class="n">NORMAL</span><span class="p">.</span><span class="n">y</span> <span class="o">-</span> <span class="n">VIEW</span><span class="p">.</span><span class="n">y</span> <span class="o">&lt;</span> <span class="mi">0</span><span class="p">.</span><span class="mi">0</span><span class="p">)</span> <span class="n">col</span> <span class="o">=</span> <span class="kt">vec3</span><span class="p">(</span><span class="mi">1</span><span class="p">.</span><span class="mi">0</span><span class="p">,</span> <span class="mi">0</span><span class="p">.</span><span class="mi">0</span><span class="p">,</span> <span class="mi">1</span><span class="p">.</span><span class="mi">0</span><span class="p">);</span>  <span class="c1">// magn</span>
    
    <span class="n">col</span> <span class="o">=</span> <span class="n">dots</span><span class="p">(</span><span class="n">SCREEN_UV</span> <span class="o">*</span> <span class="n">VIEWPORT_SIZE</span><span class="p">,</span> <span class="n">col</span><span class="p">,</span> <span class="kt">vec3</span><span class="p">(</span><span class="mi">0</span><span class="p">.</span><span class="mi">0</span><span class="p">,</span> <span class="mi">0</span><span class="p">.</span><span class="mi">0</span><span class="p">,</span> <span class="mi">0</span><span class="p">.</span><span class="mi">0</span><span class="p">),</span> <span class="mi">0</span><span class="p">.</span><span class="mi">0</span><span class="p">);</span>  <span class="c1">// right now we don't set the rotation</span>
<span class="p">}</span>

<span class="n">ALBEDO</span> <span class="o">=</span> <span class="n">col</span><span class="p">;</span>

</code></pre></div></div>

<p><code class="language-plaintext highlighter-rouge">SCREEN_UV * VIEWPORT_SIZE</code> returns the position multiplied by the screen size with the respect to the aspect ratio. Perhaps it may be needed to normalize this vector in order to get consistent dot sizes on any screen.</p>

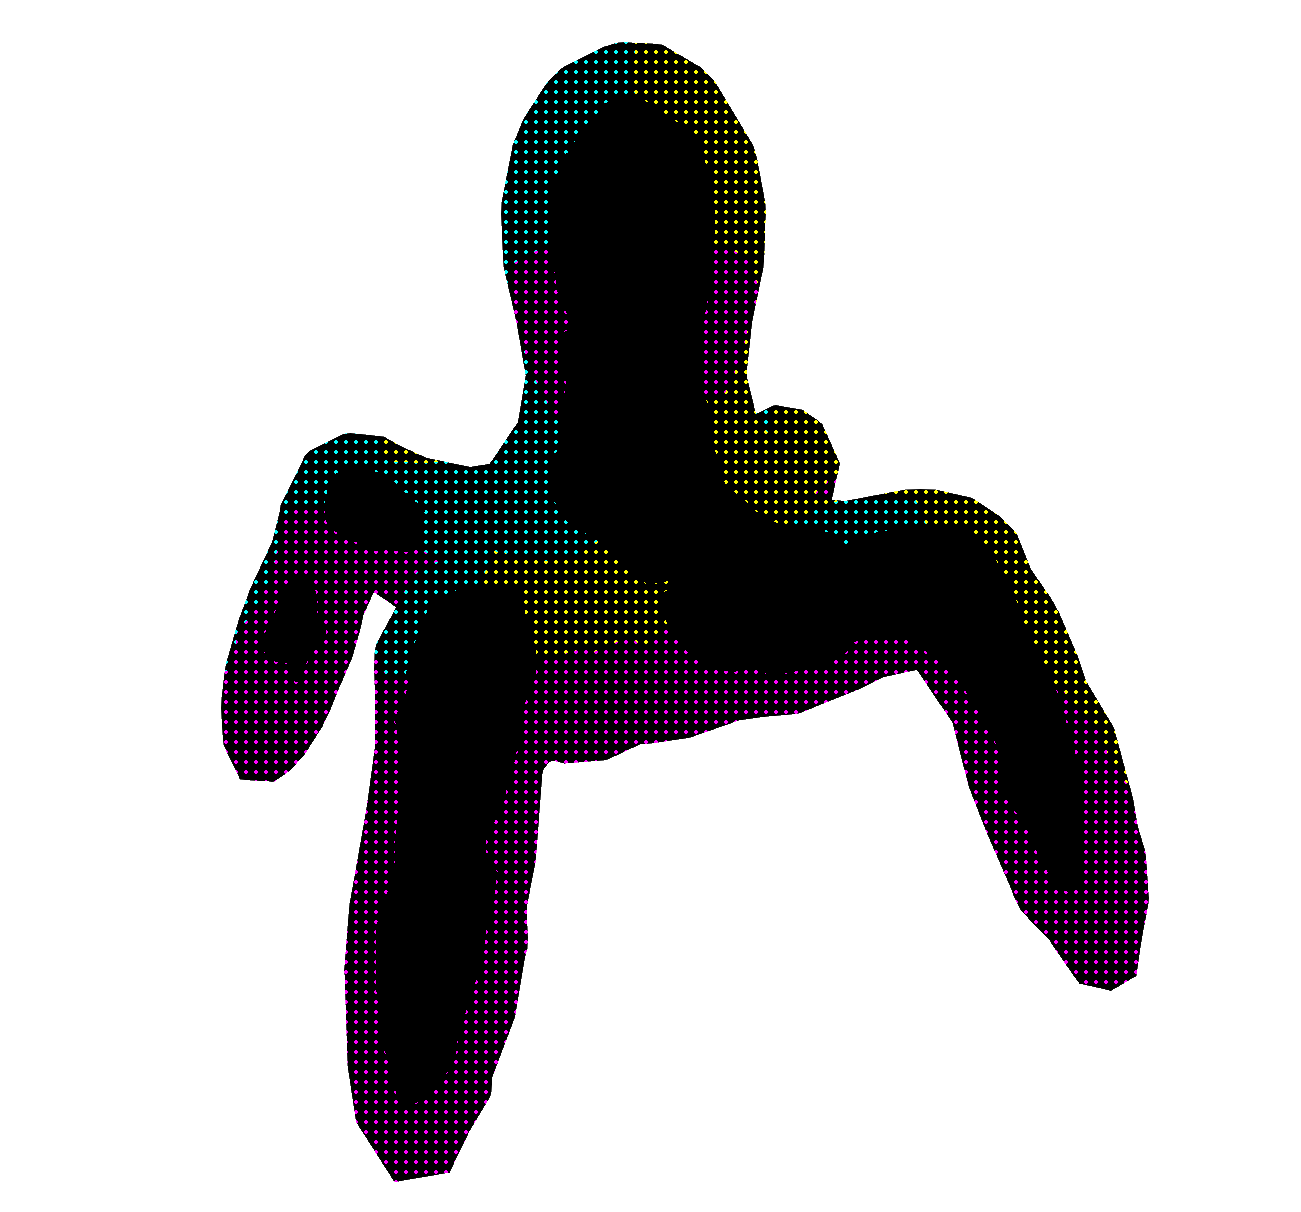
<p><img src="/assets/img/dots/spider2.png" alt="first shader step" /></p>

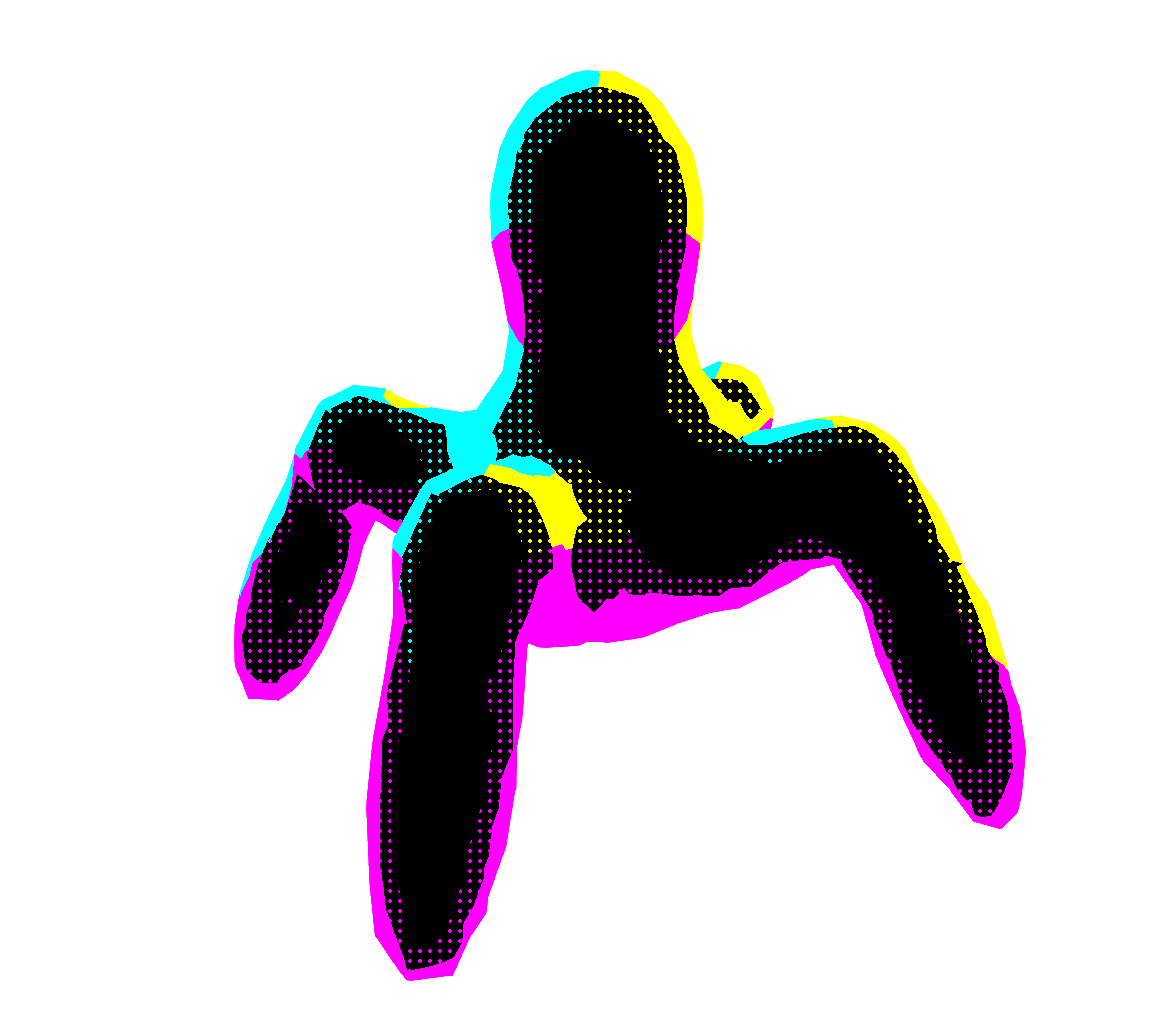
<p>At this step we can see that the model needs some border. We will color it with the corresponding CMYK value. We do it by simply adding another distance check.</p>

<div class="language-glsl highlighter-rouge"><div class="highlight"><pre class="highlight"><code>
<span class="c1">// ...</span>
<span class="k">if</span> <span class="p">(</span><span class="n">dist</span> <span class="o">&gt;</span> <span class="mi">0</span><span class="p">.</span><span class="mo">01</span><span class="p">)</span>
<span class="p">{</span>
    <span class="n">col</span> <span class="o">=</span> <span class="kt">vec3</span><span class="p">(</span><span class="mi">0</span><span class="p">.</span><span class="mi">0</span><span class="p">,</span> <span class="mi">1</span><span class="p">.</span><span class="mi">0</span><span class="p">,</span> <span class="mi">1</span><span class="p">.</span><span class="mi">0</span><span class="p">);</span>
    <span class="k">if</span> <span class="p">(</span><span class="n">NORMAL</span><span class="p">.</span><span class="n">x</span> <span class="o">-</span> <span class="n">VIEW</span><span class="p">.</span><span class="n">x</span> <span class="o">&gt;</span> <span class="mi">0</span><span class="p">.</span><span class="mi">0</span><span class="p">)</span> <span class="n">col</span> <span class="o">=</span> <span class="kt">vec3</span><span class="p">(</span><span class="mi">1</span><span class="p">.</span><span class="mi">0</span><span class="p">,</span> <span class="mi">1</span><span class="p">.</span><span class="mi">0</span><span class="p">,</span> <span class="mi">0</span><span class="p">.</span><span class="mi">0</span><span class="p">);</span>
    <span class="k">if</span> <span class="p">(</span><span class="n">NORMAL</span><span class="p">.</span><span class="n">y</span> <span class="o">-</span> <span class="n">VIEW</span><span class="p">.</span><span class="n">y</span> <span class="o">&lt;</span> <span class="mi">0</span><span class="p">.</span><span class="mi">0</span><span class="p">)</span> <span class="n">col</span> <span class="o">=</span> <span class="kt">vec3</span><span class="p">(</span><span class="mi">1</span><span class="p">.</span><span class="mi">0</span><span class="p">,</span> <span class="mi">0</span><span class="p">.</span><span class="mi">0</span><span class="p">,</span> <span class="mi">1</span><span class="p">.</span><span class="mi">0</span><span class="p">);</span>
<span class="p">}</span>
<span class="k">if</span> <span class="p">(</span><span class="n">dist</span> <span class="o">&gt;</span> <span class="mi">0</span><span class="p">.</span><span class="mo">01</span> <span class="o">&amp;&amp;</span> <span class="n">dist</span> <span class="o">&lt;</span> <span class="mi">0</span><span class="p">.</span><span class="mi">1</span><span class="p">)</span>
<span class="p">{</span>
    <span class="n">col</span> <span class="o">=</span> <span class="n">dots</span><span class="p">(</span><span class="n">SCREEN_UV</span> <span class="o">*</span> <span class="n">VIEWPORT_SIZE</span><span class="p">,</span> <span class="n">col</span><span class="p">,</span> <span class="kt">vec3</span><span class="p">(</span><span class="mi">0</span><span class="p">.</span><span class="mi">0</span><span class="p">,</span> <span class="mi">0</span><span class="p">.</span><span class="mi">0</span><span class="p">,</span> <span class="mi">0</span><span class="p">.</span><span class="mi">0</span><span class="p">),</span> <span class="mi">0</span><span class="p">.</span><span class="mi">0</span><span class="p">);</span>
<span class="p">}</span>
<span class="c1">// ...</span>

</code></pre></div></div>

<p><img src="/assets/img/dots/spider3.png" alt="second shader step" /></p>

<p>This is much better! Now the model stands out from the rest of the scene. Now we should add the distance check and disable the dots when we are too far away to prevent movement sickness.</p>

<div class="language-glsl highlighter-rouge"><div class="highlight"><pre class="highlight"><code>
<span class="c1">// in the uniforms declaration</span>
<span class="k">uniform</span> <span class="kt">float</span> <span class="n">dots_hiding_threshold</span> <span class="o">=</span> <span class="mi">0</span><span class="p">.</span><span class="mo">005</span><span class="p">;</span>

<span class="c1">// ...</span>

<span class="kt">void</span> <span class="nf">fragment</span><span class="p">()</span>
<span class="p">{</span>
    <span class="kt">vec3</span> <span class="n">col</span> <span class="o">=</span> <span class="kt">vec3</span><span class="p">(</span><span class="mi">0</span><span class="p">.</span><span class="mi">0</span><span class="p">,</span> <span class="mi">0</span><span class="p">.</span><span class="mi">0</span><span class="p">,</span> <span class="mi">0</span><span class="p">.</span><span class="mi">0</span><span class="p">);</span>
    <span class="kt">float</span> <span class="n">dist</span> <span class="o">=</span> <span class="n">pow</span><span class="p">(</span><span class="mi">1</span><span class="p">.</span><span class="mi">0</span> <span class="o">-</span> <span class="n">dot</span><span class="p">(</span><span class="n">NORMAL</span><span class="p">,</span> <span class="n">VIEW</span><span class="p">),</span> <span class="n">power</span><span class="p">);</span>
    <span class="kt">float</span> <span class="n">cam_dist</span> <span class="o">=</span> <span class="n">pow</span><span class="p">(</span><span class="n">length</span><span class="p">(</span><span class="n">VERTEX</span> <span class="o">-</span> <span class="n">VIEW</span><span class="p">),</span> <span class="mi">2</span><span class="p">)</span> <span class="o">*</span> <span class="n">dots_hiding_threshold</span><span class="p">;</span>

    <span class="k">if</span> <span class="p">(</span><span class="n">dist</span> <span class="o">&gt;</span> <span class="mi">0</span><span class="p">.</span><span class="mo">01</span><span class="p">)</span>
    <span class="p">{</span>
        <span class="n">col</span> <span class="o">=</span> <span class="kt">vec3</span><span class="p">(</span><span class="mi">0</span><span class="p">.</span><span class="mi">0</span><span class="p">,</span> <span class="mi">1</span><span class="p">.</span><span class="mi">0</span><span class="p">,</span> <span class="mi">1</span><span class="p">.</span><span class="mi">0</span><span class="p">);</span>
        <span class="k">if</span> <span class="p">(</span><span class="n">NORMAL</span><span class="p">.</span><span class="n">x</span> <span class="o">-</span> <span class="n">VIEW</span><span class="p">.</span><span class="n">x</span> <span class="o">&gt;</span> <span class="mi">0</span><span class="p">.</span><span class="mi">0</span><span class="p">)</span> <span class="n">col</span> <span class="o">=</span> <span class="kt">vec3</span><span class="p">(</span><span class="mi">1</span><span class="p">.</span><span class="mi">0</span><span class="p">,</span> <span class="mi">1</span><span class="p">.</span><span class="mi">0</span><span class="p">,</span> <span class="mi">0</span><span class="p">.</span><span class="mi">0</span><span class="p">);</span>
        <span class="k">if</span> <span class="p">(</span><span class="n">NORMAL</span><span class="p">.</span><span class="n">y</span> <span class="o">-</span> <span class="n">VIEW</span><span class="p">.</span><span class="n">y</span> <span class="o">&lt;</span> <span class="mi">0</span><span class="p">.</span><span class="mi">0</span><span class="p">)</span> <span class="n">col</span> <span class="o">=</span> <span class="kt">vec3</span><span class="p">(</span><span class="mi">1</span><span class="p">.</span><span class="mi">0</span><span class="p">,</span> <span class="mi">0</span><span class="p">.</span><span class="mi">0</span><span class="p">,</span> <span class="mi">1</span><span class="p">.</span><span class="mi">0</span><span class="p">);</span>
    <span class="p">}</span>
    <span class="k">if</span> <span class="p">(</span><span class="n">dist</span> <span class="o">&gt;</span> <span class="mi">0</span><span class="p">.</span><span class="mo">01</span> <span class="o">&amp;&amp;</span> <span class="n">dist</span> <span class="o">&lt;</span> <span class="mi">0</span><span class="p">.</span><span class="mi">1</span> <span class="o">-</span> <span class="n">cam_dist</span><span class="p">)</span>  <span class="c1">// we do not draw dots if we are too far away</span>
    <span class="p">{</span>
        <span class="n">col</span> <span class="o">=</span> <span class="n">dots</span><span class="p">(</span><span class="n">SCREEN_UV</span> <span class="o">*</span> <span class="n">VIEWPORT_SIZE</span><span class="p">,</span> <span class="n">col</span><span class="p">,</span> <span class="kt">vec3</span><span class="p">(</span><span class="mi">0</span><span class="p">.</span><span class="mi">0</span><span class="p">,</span> <span class="mi">0</span><span class="p">.</span><span class="mi">0</span><span class="p">,</span> <span class="mi">0</span><span class="p">.</span><span class="mi">0</span><span class="p">),</span> <span class="mi">0</span><span class="p">.</span><span class="mi">0</span><span class="p">);</span>
    <span class="p">}</span>
    <span class="n">ALBEDO</span> <span class="o">=</span> <span class="n">col</span><span class="p">;</span>
<span class="p">}</span>

</code></pre></div></div>

<p><img src="/assets/img/dots/spider4.png" alt="third shader step" /></p>

<p>We are too far away and cannot see the dots. The last thing that we would need to implement is the rotation and movement of the dots. We would need some kind of hash function to add random movement. Such function is sine/cosine: if we pass <code class="language-plaintext highlighter-rouge">TIME</code> variable, we will get wave-like change of the parameter over time. If we sum two of these functions with different parameters, we would get pseudo random oscillation that repeats over some time. Such functions \(a_1 \sin{(t + b_1)} + ... + a_n \sin{(t + b_n)}\) are called wave functions and are actually used in water shaders. Acerola has a <a href="https://www.youtube.com/watch?v=PH9q0HNBjT4">nice video on this topic</a></p>

<p>I didn’t declare these constants to the uniform variables to avoid the cluttering of the settings window. Feel free to play around with those.</p>

<div class="language-glsl highlighter-rouge"><div class="highlight"><pre class="highlight"><code>
<span class="c1">// ...</span>
<span class="k">if</span> <span class="p">(</span><span class="n">dist</span> <span class="o">&gt;</span> <span class="mi">0</span><span class="p">.</span><span class="mo">01</span><span class="p">)</span>
<span class="p">{</span>
    <span class="n">col</span> <span class="o">=</span> <span class="kt">vec3</span><span class="p">(</span><span class="mi">0</span><span class="p">.</span><span class="mi">0</span><span class="p">,</span> <span class="mi">1</span><span class="p">.</span><span class="mi">0</span><span class="p">,</span> <span class="mi">1</span><span class="p">.</span><span class="mi">0</span><span class="p">);</span>
    <span class="k">if</span> <span class="p">(</span><span class="n">NORMAL</span><span class="p">.</span><span class="n">x</span> <span class="o">-</span> <span class="n">VIEW</span><span class="p">.</span><span class="n">x</span><span class="o">*</span><span class="n">cos</span><span class="p">(</span><span class="n">TIME</span><span class="o">+</span><span class="n">b_1</span><span class="p">)</span><span class="o">*</span><span class="n">a_1</span><span class="o">+</span><span class="n">c_1</span> <span class="o">&gt;</span> <span class="mi">0</span><span class="p">.</span><span class="mi">0</span><span class="p">)</span> <span class="n">col</span> <span class="o">=</span> <span class="kt">vec3</span><span class="p">(</span><span class="mi">1</span><span class="p">.</span><span class="mi">0</span><span class="p">,</span> <span class="mi">1</span><span class="p">.</span><span class="mi">0</span><span class="p">,</span> <span class="mi">0</span><span class="p">.</span><span class="mi">0</span><span class="p">);</span>
    <span class="k">if</span> <span class="p">(</span><span class="n">NORMAL</span><span class="p">.</span><span class="n">y</span> <span class="o">-</span> <span class="n">VIEW</span><span class="p">.</span><span class="n">y</span> <span class="o">&lt;</span> <span class="mi">0</span><span class="p">.</span><span class="mo">05</span> <span class="o">+</span> <span class="n">sin</span><span class="p">(</span><span class="n">TIME</span><span class="o">+</span><span class="n">b_2</span><span class="p">)</span><span class="o">*</span><span class="n">a_2</span><span class="o">+</span><span class="n">cos</span><span class="p">(</span><span class="n">TIME</span><span class="o">+</span><span class="n">b_3</span><span class="p">)</span><span class="o">*</span><span class="n">a_3</span><span class="p">)</span> <span class="n">col</span> <span class="o">=</span> <span class="kt">vec3</span><span class="p">(</span><span class="mi">1</span><span class="p">.</span><span class="mi">0</span><span class="p">,</span> <span class="mi">0</span><span class="p">.</span><span class="mi">0</span><span class="p">,</span> <span class="mi">1</span><span class="p">.</span><span class="mi">0</span><span class="p">);</span>
<span class="p">}</span>
<span class="k">if</span> <span class="p">(</span><span class="n">dist</span> <span class="o">&gt;</span> <span class="mi">0</span><span class="p">.</span><span class="mo">01</span> <span class="o">&amp;&amp;</span> <span class="n">dist</span> <span class="o">&lt;</span> <span class="mi">0</span><span class="p">.</span><span class="mi">1</span> <span class="o">-</span> <span class="n">cam_dist</span><span class="p">)</span>
<span class="p">{</span>
    <span class="n">col</span> <span class="o">=</span> <span class="n">dots</span><span class="p">(</span><span class="n">SCREEN_UV</span> <span class="o">*</span> <span class="n">VIEWPORT_SIZE</span><span class="p">,</span> <span class="n">col</span><span class="p">,</span> <span class="kt">vec3</span><span class="p">(</span><span class="mi">0</span><span class="p">.</span><span class="mi">0</span><span class="p">,</span> <span class="mi">0</span><span class="p">.</span><span class="mi">0</span><span class="p">,</span> <span class="mi">0</span><span class="p">.</span><span class="mi">0</span><span class="p">),</span> <span class="n">a_x</span><span class="o">*</span><span class="n">col</span><span class="p">.</span><span class="n">x</span><span class="o">*</span><span class="n">sin</span><span class="p">(</span><span class="n">TIME</span><span class="p">)</span><span class="o">/</span><span class="n">a_s</span> <span class="o">+</span> <span class="n">a_y</span><span class="o">*</span><span class="n">col</span><span class="p">.</span><span class="n">y</span> <span class="o">+</span> <span class="n">a_z</span><span class="o">*</span><span class="n">col</span><span class="p">.</span><span class="n">z</span><span class="p">);</span>
<span class="p">}</span>
<span class="c1">// ...</span>

</code></pre></div></div>

<p>In order to get random rotation for each color, we perform some ‘hash’ formula on the color r, g, b values.</p>

<video controls=""><source src="/assets/img/dots/spider5.mp4" type="video/mp4" /></video>

<h2 id="repository">Repository</h2>

<p><strong>The code and models are available on Github: <a href="https://github.com/enaix/godot-cmyk-dot-shader">https://github.com/enaix/godot-cmyk-dot-shader</a></strong></p>

<h2 id="final-code-version">Final code version</h2>

<div class="language-glsl highlighter-rouge"><div class="highlight"><pre class="highlight"><code><span class="n">shader_type</span> <span class="n">spatial</span><span class="p">;</span>

<span class="n">render_mode</span> <span class="n">unshaded</span><span class="p">;</span>

<span class="k">uniform</span> <span class="kt">float</span> <span class="n">power</span> <span class="o">=</span> <span class="mi">3</span><span class="p">;</span>

<span class="k">uniform</span> <span class="kt">float</span> <span class="n">dot_spacing</span> <span class="o">=</span> <span class="mi">10</span><span class="p">;</span>
<span class="k">uniform</span> <span class="kt">float</span> <span class="n">dot_size</span> <span class="o">=</span> <span class="mi">2</span><span class="p">;</span>
<span class="k">uniform</span> <span class="kt">float</span> <span class="n">dots_hiding_threshold</span> <span class="o">=</span> <span class="mi">0</span><span class="p">.</span><span class="mo">003</span><span class="p">;</span>

<span class="k">const</span> <span class="kt">float</span> <span class="n">a_1</span> <span class="o">=</span> <span class="mi">2</span><span class="p">.</span><span class="mi">0</span><span class="p">;</span>
<span class="k">const</span> <span class="kt">float</span> <span class="n">a_2</span> <span class="o">=</span> <span class="mi">0</span><span class="p">.</span><span class="mi">1</span><span class="p">;</span>
<span class="k">const</span> <span class="kt">float</span> <span class="n">a_3</span> <span class="o">=</span> <span class="mi">0</span><span class="p">.</span><span class="mi">12</span><span class="p">;</span>

<span class="k">const</span> <span class="kt">float</span> <span class="n">b_1</span> <span class="o">=</span> <span class="mi">0</span><span class="p">.</span><span class="mi">0</span><span class="p">;</span>
<span class="k">const</span> <span class="kt">float</span> <span class="n">b_2</span> <span class="o">=</span> <span class="mi">0</span><span class="p">.</span><span class="mi">0</span><span class="p">;</span>
<span class="k">const</span> <span class="kt">float</span> <span class="n">b_3</span> <span class="o">=</span> <span class="mi">2</span><span class="p">.</span><span class="mi">0</span><span class="p">;</span>

<span class="k">const</span> <span class="kt">float</span> <span class="n">c_1</span> <span class="o">=</span> <span class="o">-</span><span class="mi">0</span><span class="p">.</span><span class="mi">3</span><span class="p">;</span>

<span class="k">const</span> <span class="kt">float</span> <span class="n">a_x</span> <span class="o">=</span> <span class="mi">14</span><span class="p">.</span><span class="mi">3</span><span class="p">;</span>
<span class="k">const</span> <span class="kt">float</span> <span class="n">a_y</span> <span class="o">=</span> <span class="mi">13</span><span class="p">.</span><span class="mi">2</span><span class="p">;</span>
<span class="k">const</span> <span class="kt">float</span> <span class="n">a_z</span> <span class="o">=</span> <span class="mi">43</span><span class="p">.</span><span class="mi">3</span><span class="p">;</span>
<span class="k">const</span> <span class="kt">float</span> <span class="n">a_s</span> <span class="o">=</span> <span class="mi">10000</span><span class="p">.</span><span class="mi">0</span><span class="p">;</span>

<span class="kt">vec3</span> <span class="nf">dots</span><span class="p">(</span><span class="kt">vec2</span> <span class="n">pos</span><span class="p">,</span> <span class="kt">vec3</span> <span class="n">dotcol</span><span class="p">,</span> <span class="kt">vec3</span> <span class="n">black</span><span class="p">,</span> <span class="kt">float</span> <span class="n">a</span><span class="p">)</span>
<span class="p">{</span>
    <span class="n">pos</span> <span class="o">=</span> <span class="kt">mat2</span><span class="p">(</span><span class="kt">vec2</span><span class="p">(</span><span class="n">cos</span><span class="p">(</span><span class="n">a</span><span class="p">),</span> <span class="n">sin</span><span class="p">(</span><span class="n">a</span><span class="p">)),</span> <span class="kt">vec2</span><span class="p">(</span><span class="o">-</span><span class="n">sin</span><span class="p">(</span><span class="n">a</span><span class="p">),</span> <span class="n">cos</span><span class="p">(</span><span class="n">a</span><span class="p">)))</span> <span class="o">*</span> <span class="n">pos</span><span class="p">;</span>
    <span class="k">if</span> <span class="p">(</span><span class="n">pow</span><span class="p">(</span><span class="n">mod</span><span class="p">(</span><span class="n">pos</span><span class="p">.</span><span class="n">x</span><span class="p">,</span> <span class="n">dot_spacing</span><span class="p">)</span> <span class="o">-</span> <span class="n">dot_size</span><span class="p">,</span> <span class="mi">2</span><span class="p">)</span> <span class="o">+</span> <span class="n">pow</span><span class="p">(</span><span class="n">mod</span><span class="p">(</span><span class="n">pos</span><span class="p">.</span><span class="n">y</span><span class="p">,</span> <span class="n">dot_spacing</span><span class="p">)</span> <span class="o">-</span> <span class="n">dot_size</span><span class="p">,</span> <span class="mi">2</span><span class="p">)</span> <span class="o">&lt;=</span> <span class="n">dot_size</span><span class="o">*</span><span class="n">dot_size</span><span class="p">)</span>
    <span class="p">{</span>
        <span class="k">return</span> <span class="n">dotcol</span><span class="p">;</span>
    <span class="p">}</span>
    <span class="k">return</span> <span class="n">black</span><span class="p">;</span>
<span class="p">}</span>

<span class="kt">void</span> <span class="nf">fragment</span><span class="p">()</span>
<span class="p">{</span>
    <span class="kt">vec3</span> <span class="n">col</span> <span class="o">=</span> <span class="kt">vec3</span><span class="p">(</span><span class="mi">0</span><span class="p">.</span><span class="mi">0</span><span class="p">,</span> <span class="mi">0</span><span class="p">.</span><span class="mi">0</span><span class="p">,</span> <span class="mi">0</span><span class="p">.</span><span class="mi">0</span><span class="p">);</span>
    <span class="kt">float</span> <span class="n">dist</span> <span class="o">=</span> <span class="n">pow</span><span class="p">(</span><span class="mi">1</span><span class="p">.</span><span class="mi">0</span> <span class="o">-</span> <span class="n">dot</span><span class="p">(</span><span class="n">NORMAL</span><span class="p">,</span> <span class="n">VIEW</span><span class="p">),</span> <span class="n">power</span><span class="p">);</span>
    <span class="kt">float</span> <span class="n">cam_dist</span> <span class="o">=</span> <span class="n">pow</span><span class="p">(</span><span class="n">length</span><span class="p">(</span><span class="n">VERTEX</span> <span class="o">-</span> <span class="n">VIEW</span><span class="p">),</span> <span class="mi">2</span><span class="p">)</span><span class="o">*</span><span class="n">dots_hiding_threshold</span><span class="p">;</span>

    <span class="k">if</span> <span class="p">(</span><span class="n">dist</span> <span class="o">&gt;</span> <span class="mi">0</span><span class="p">.</span><span class="mo">01</span><span class="p">)</span>
    <span class="p">{</span>
        <span class="n">col</span> <span class="o">=</span> <span class="kt">vec3</span><span class="p">(</span><span class="mi">0</span><span class="p">.</span><span class="mi">0</span><span class="p">,</span> <span class="mi">1</span><span class="p">.</span><span class="mi">0</span><span class="p">,</span> <span class="mi">1</span><span class="p">.</span><span class="mi">0</span><span class="p">);</span>
        <span class="k">if</span> <span class="p">(</span><span class="n">NORMAL</span><span class="p">.</span><span class="n">x</span> <span class="o">-</span> <span class="n">VIEW</span><span class="p">.</span><span class="n">x</span><span class="o">*</span><span class="n">cos</span><span class="p">(</span><span class="n">TIME</span><span class="o">+</span><span class="n">b_1</span><span class="p">)</span><span class="o">*</span><span class="n">a_1</span><span class="o">+</span><span class="n">c_1</span> <span class="o">&gt;</span> <span class="mi">0</span><span class="p">.</span><span class="mi">0</span><span class="p">)</span> <span class="n">col</span> <span class="o">=</span> <span class="kt">vec3</span><span class="p">(</span><span class="mi">1</span><span class="p">.</span><span class="mi">0</span><span class="p">,</span> <span class="mi">1</span><span class="p">.</span><span class="mi">0</span><span class="p">,</span> <span class="mi">0</span><span class="p">.</span><span class="mi">0</span><span class="p">);</span>
        <span class="k">if</span> <span class="p">(</span><span class="n">NORMAL</span><span class="p">.</span><span class="n">y</span> <span class="o">-</span> <span class="n">VIEW</span><span class="p">.</span><span class="n">y</span> <span class="o">&lt;</span> <span class="mi">0</span><span class="p">.</span><span class="mo">05</span> <span class="o">+</span> <span class="n">sin</span><span class="p">(</span><span class="n">TIME</span><span class="o">+</span><span class="n">b_2</span><span class="p">)</span><span class="o">*</span><span class="n">a_2</span><span class="o">+</span><span class="n">cos</span><span class="p">(</span><span class="n">TIME</span><span class="o">+</span><span class="n">b_3</span><span class="p">)</span><span class="o">*</span><span class="n">a_3</span><span class="p">)</span> <span class="n">col</span> <span class="o">=</span> <span class="kt">vec3</span><span class="p">(</span><span class="mi">1</span><span class="p">.</span><span class="mi">0</span><span class="p">,</span> <span class="mi">0</span><span class="p">.</span><span class="mi">0</span><span class="p">,</span> <span class="mi">1</span><span class="p">.</span><span class="mi">0</span><span class="p">);</span>
    <span class="p">}</span>
    <span class="k">if</span> <span class="p">(</span><span class="n">dist</span> <span class="o">&gt;</span> <span class="mi">0</span><span class="p">.</span><span class="mo">01</span> <span class="o">&amp;&amp;</span> <span class="n">dist</span> <span class="o">&lt;</span> <span class="mi">0</span><span class="p">.</span><span class="mi">1</span> <span class="o">-</span> <span class="n">cam_dist</span><span class="p">)</span>
    <span class="p">{</span>
        <span class="n">col</span> <span class="o">=</span> <span class="n">dots</span><span class="p">(</span><span class="n">SCREEN_UV</span> <span class="o">*</span> <span class="n">VIEWPORT_SIZE</span><span class="p">,</span> <span class="n">col</span><span class="p">,</span> <span class="kt">vec3</span><span class="p">(</span><span class="mi">0</span><span class="p">.</span><span class="mi">0</span><span class="p">,</span> <span class="mi">0</span><span class="p">.</span><span class="mi">0</span><span class="p">,</span> <span class="mi">0</span><span class="p">.</span><span class="mi">0</span><span class="p">),</span> <span class="n">a_x</span><span class="o">*</span><span class="n">col</span><span class="p">.</span><span class="n">x</span><span class="o">*</span><span class="n">sin</span><span class="p">(</span><span class="n">TIME</span><span class="p">)</span><span class="o">/</span><span class="n">a_s</span> <span class="o">+</span> <span class="n">a_y</span><span class="o">*</span><span class="n">col</span><span class="p">.</span><span class="n">y</span> <span class="o">+</span> <span class="n">a_z</span><span class="o">*</span><span class="n">col</span><span class="p">.</span><span class="n">z</span><span class="p">);</span>
    <span class="p">}</span>
    <span class="n">ALBEDO</span> <span class="o">=</span> <span class="n">col</span><span class="p">;</span>
<span class="p">}</span>
</code></pre></div></div>]]></content><author><name></name></author><summary type="html"><![CDATA[]]></summary><media:thumbnail xmlns:media="http://search.yahoo.com/mrss/" url="https://enaix.github.io/assets/img/dots/banner.png" /><media:content medium="image" url="https://enaix.github.io/assets/img/dots/banner.png" xmlns:media="http://search.yahoo.com/mrss/" /></entry><entry><title type="html">Selfhosted cloud gaming using steam link</title><link href="https://enaix.github.io/2023/03/04/selfhosted-cloud-gaming.html" rel="alternate" type="text/html" title="Selfhosted cloud gaming using steam link" /><published>2023-03-04T09:21:13+00:00</published><updated>2023-03-04T09:21:13+00:00</updated><id>https://enaix.github.io/2023/03/04/selfhosted-cloud-gaming</id><content type="html" xml:base="https://enaix.github.io/2023/03/04/selfhosted-cloud-gaming.html"><![CDATA[<p>Recently I have found myself in a classical situation with a powerful rig at home, while using an ultrabook 90% of the time. This piece of hardware cannot even run <em>TF2</em> due to problematic 10-th gen i3 processor that goes full throttle (4 GHz) at idle. So, I’ve decided to try setting up home vpn and playing/working remotely on the desktop PC.</p>

<h2 id="how-this-works">How this works</h2>

<p><img src="/assets/img/01_graph01.png" alt="image cloud_gaming_graph" /></p>

<h3 id="network">Network</h3>

<p>As you see, the remote client connects to the <em>wireguard</em> server hosted on the <em>Raspberry PI</em>. It is possible to host it on the main rig, but it would be impossible to send the magic packet in case if the rig is turned off.</p>

<p>It is recommended to buy a <em>static IP</em> from the provider for better user experience (and I’m sure that you don’t want to randomly lose access due to the router rebooting and changing dynamic ip address). If it is not an option and your router is accessible from outside (there is no double NAT), you may use a <a href="https://github.com/enaix/tg-remote-ssh">telegram bot</a> or a <em>dynDNS</em> service to get the ip.</p>

<p>If you are under <em>double nat</em>, then there is not much of a choice: forwarding services like Ngrok or localhost.run provide miserable speed. Selfhosted vps with an ssh tunnel may get you somewhere, but it still heavily limits your connection speed. From my experience, paying for a static ip is the best choice.</p>

<h3 id="streaming">Streaming</h3>

<p><em>Steam Remote Play</em> is by far the best option in terms of speed and quality. Any remote desktop solutions like <em>VNC</em> or <em>nomachine</em> have different video encoding algorithms and have miserable framerate. If you are using Windows, you may give <em>Moonlight</em> a try. Also, Steam has magnificant input system that supports any input. I was surprised that it even supports Samsung physical keyboards on Android!</p>

<h3 id="installation">Installation</h3>

<p>I won’t cover <em>wireguard</em> installation process, since there are dozens of guides online (<a href="https://davidshomelab.com/access-your-home-network-from-anywhere-with-wireguard-vpn/">one</a> <a href="https://linuxize.com/post/how-to-set-up-wireguard-vpn-on-ubuntu-20-04/">two</a>). I also recommend to setup an SSH server and VNC/Nomachine on your home PC to be able to launch Steam if the system reboots. You also need to enable <em>Remote Play</em> in Steam settings and install <em>Steam Link</em> client on your laptop/tablet.</p>

<h2 id="does-it-work-right">Does it work, right?</h2>

<p>Right after buying static ip from my provider and setting up the vpn, I finally see the remote screen and… it crashes after a minute. Furthermore, Steam client on the rig crashes alongside with Steam Link, which is extremely weird. It allows me to play any game, but it always dies after a minute or two.</p>

<p>On the next day I noticed that my home router is inaccessible. The router started to randomly drop the link (requiring a reboot each time), the problem was that it could not handle the load. So yeah, an old router may have problems with a static ip.</p>

<p>As for the Steam client, the root of the problem was in the commit in Xorg that ended up breaking some obscure software including Remote Play. It was considered to be non-critical, so why it took so long for the dev team to revert the commit.</p>

<p>Fast-forward in 2 months: it was either the Xorg team or a recent Remote Play update that fixed the issue!</p>

<h2 id="test-results">Test results</h2>

<p>720p, reasonable FPS (I get around 40-60 I guess) on 10 mbps home link (gigabit ethernet at home) + 100 mbps local wifi with not-so-bad delay. Not gonna lie, you would have troubles playing competitive shooters, but it is enough to play almost any game you wish.</p>

<p>If you add a non-steam game (for example a Lutris launcher), you can also run pretty much any program you wish.</p>

<p>Overall, I recommend this solution for those who don’t wish to pay for cloud gaming solutions or want to stream games with minimal latency.</p>]]></content><author><name></name></author><summary type="html"><![CDATA[Recently I have found myself in a classical situation with a powerful rig at home, while using an ultrabook 90% of the time. This piece of hardware cannot even run TF2 due to problematic 10-th gen i3 processor that goes full throttle (4 GHz) at idle. So, I’ve decided to try setting up home vpn and playing/working remotely on the desktop PC.]]></summary></entry></feed>